
Mid-Century Ductwork: Airflow Checks | Hillsboro, MO
Quick Summary
Cleaning alone will not fix leaking, crushed, or disconnected ductwork. Start with a visual inspection of accessible ducts, then have a technician check airflow and determine whether sealing, repairs, or replacement makes sense.
- Check accessible basement trunk lines, register openings, and attic runs for separated seams, crushed flexible duct, and rust.
- Photograph accessible register openings, visible joints, and the furnace data plate before calling.
- Seal leaking seams where the metal is sound, and restore insulation where needed. Replace deteriorated duct board sections.
- Have a qualified professional assess suspected asbestos, mold, or pest contamination before disturbing anything.
- Ask for before-and-after photos, properly sealed joints, restored insulation, and room-by-room airflow checks.
Ricotta Heating & Air is a family-owned HVAC company based in Hillsboro, MO. Contact us about a ductwork evaluation.
Table of Contents
- Why Mid-Century Ductwork Needs a Closer Look
- A Room-by-Room Visual Check of Older Ductwork
- Signs of Leaking Ductwork in Older Homes
- Ductwork Airflow Problems: Weak Airflow, Whistling, and Hot Spots
- Clean, Repair, Seal, or Replace: How to Decide
- HVAC Replacement in Older Homes: How Ductwork Affects the Decision
- How to Check the Finished Work
- Schedule a Duct and System Evaluation
- Frequently Asked Questions
Why Mid-Century Ductwork Needs a Closer Look
Mid-century homes in Jefferson County may still have original ductwork alongside newer furnaces, air conditioners, and room additions. That mix deserves a closer look when some rooms will not stay comfortable.
Older duct joints may have loose tape or unsealed seams. The runs may have been sized for different equipment, and insulation around ducts in unconditioned spaces may be damaged or missing. Missouri's humid summers and cold winters make those problems especially noticeable.
The first question is not whether the ducts need cleaning. It is what is causing the problem—and which repair will address it.
Here is how to approach the visual inspection, airflow checks, and repair-or-replace decision.
Materials and Layouts in 1950s and 1960s Homes
Older homes may have rigid galvanized steel ducts, flexible duct added during later work, or fiberglass duct board. Steel can remain usable even when its joints leak. Flexible duct can sag or tear, while duct board needs closer attention when its edges deteriorate or become wet.
Layout matters just as much as material. A central furnace may feed floor registers through a main trunk and branch ducts. Later additions or remodeling can change airflow needs without a matching duct upgrade, leaving one room too warm and another too cold.
If your house dates to the 1950s, our guide to repairing ductwork in 1950s homes explains repairs suited to older systems.
A Room-by-Room Visual Check of Older Ductwork
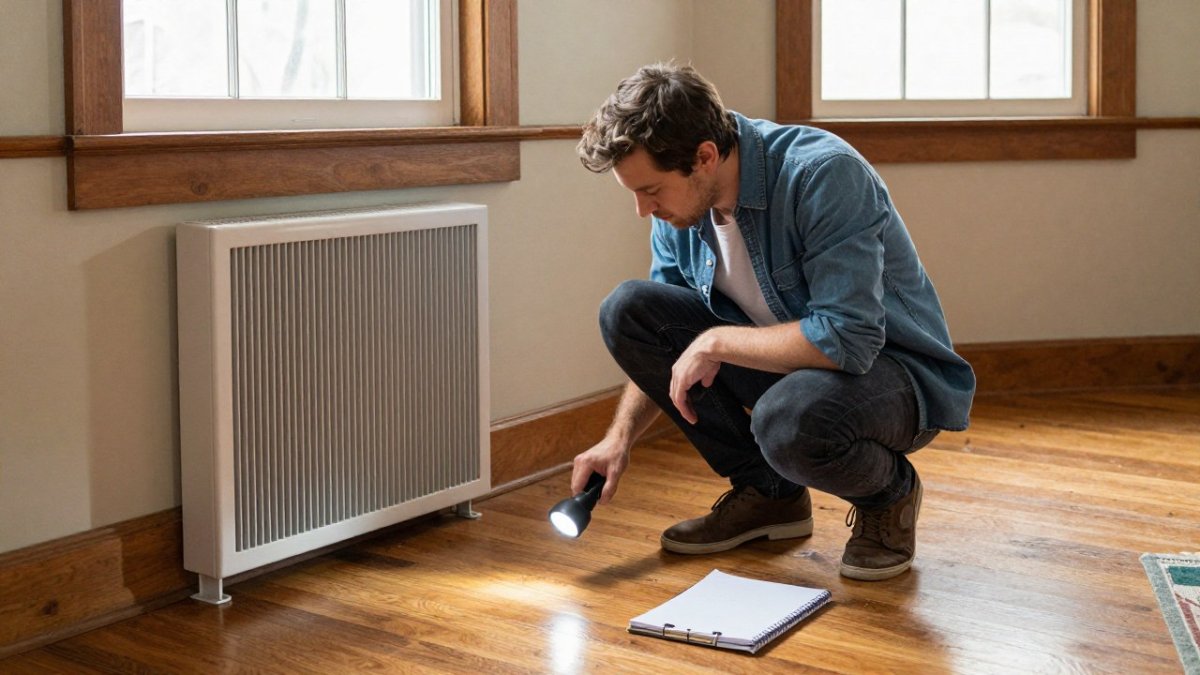
Start with a flashlight and a phone camera. Look for disconnected joints, crushed sections, rust, and water stains in areas you can reach safely. Do not open walls, remove duct insulation, or disturb old tape or wrap. Suspected asbestos-containing materials need professional assessment before anyone touches them.
Work through the house in this order, skipping any space without safe access:
- Basement or crawlspace. From a safe, accessible location, follow the main trunk from the furnace. Look for separated seams, sagging flexible duct, and rust along the bottom.
- Each room. Check that furniture and rugs are not blocking registers. If a cover comes off easily without disturbing surrounding material, shine a light inside and look for visible gaps or debris. Do not reach into the duct.
- The attic. Check only from safe access points with secure footing. Look for sagging ducts and torn outer jackets. Leave hard-to-reach areas to a technician.
What to Photograph Before Calling
Photograph accessible register openings, visible joints, and the data plate on the furnace or air handler. Take a wide shot of the main trunk and close-ups of any rust, gaps, or tears without touching damaged material. These photos give the technician useful context and document the condition before work begins.
For a closer look at the furnace side, see our article on furnace ductwork inspection for older homes.
Signs of Leaking Ductwork in Older Homes
Duct leaks are not always visible. Possible signs include:
- Rooms that do not reach the thermostat setting
- Unusual dust buildup on furniture
- Whistling or rushing sounds at a register
- Higher energy bills without an obvious explanation
- Musty smells when the system starts
These symptoms do not prove the ducts are leaking. Filter restrictions, equipment problems, insulation gaps, and moisture issues can cause similar complaints. Damp ductwork deserves attention because moisture can contribute to deterioration and microbial growth.
Ductwork Airflow Problems: Weak Airflow, Whistling, and Hot Spots
Weak airflow can come from a dirty filter, a damaged branch duct, an undersized return, a closed damper, or a blower problem. Remodeling may also block a return path or change how air moves between rooms.
Use these clues to help describe the problem to a technician:
- One room has weak airflow: check for a blocked register; the branch duct or its damper may also need inspection.
- The whole house has weak airflow: check the filter and make sure return grilles are unobstructed.
- One register whistles: a restriction or high air velocity may be responsible.
- Upstairs is hot while downstairs is cold: duct balance, return airflow, insulation, and heat gain may all play a part.
If weak airflow comes with a persistent burning smell or unusual mechanical noise, turn the system off and call a technician. Do not assume it is only a duct problem. If you see smoke or suspect a fire, leave the home and call emergency services.
PO Box 142, Hillsboro, MO 63050
View mailing address on Google MapsClean, Repair, Seal, or Replace: How to Decide
Start with safety, then check the duct material, physical condition, and airflow requirements before choosing a repair.
Step 1: Check for hazards. Stop if you see suspected asbestos-containing material, deteriorating duct board, possible mold, pest debris, or a damaged liner. Do not brush, vacuum, or disturb it. Have the appropriate professional assess the material and recommend safe handling. This guide to rodent-damaged HVAC vents provides background on pest contamination, but it does not replace an on-site assessment.
Step 2: Is a run crushed, disconnected, or torn? Repair or replace that section. Adjusting the thermostat or changing a filter will not reconnect a broken duct.
Step 3: Are joints leaking while the metal remains sound? Sealing may be appropriate. Use duct-rated materials suited to the application, and restore insulation where needed after the joints are repaired.
Step 4: Is duct board deteriorating or water-damaged? Have the affected section evaluated for replacement. Address the moisture source as well; sealing over damaged material does not solve the underlying problem.
Step 5: Is the duct system too small for the equipment's airflow needs? Have a technician measure airflow and static pressure and recommend changes. Coordinate duct design with any planned equipment replacement, but do not postpone corrections needed for safe operation.
Step 6: Is everything intact with only light dust present? Routine filter changes, register cleaning, and equipment maintenance may be enough. Cleaning does not correct leaks or airflow restrictions.
Repairing a section makes sense when the rest of the system is in good condition. Widespread deterioration or a poor layout may call for more extensive changes.
Return-air capacity should be checked as part of sealing work. Closing leaks can reveal an existing airflow restriction, so the technician should verify system performance afterward rather than treating leakage as a substitute for a proper return.
Our step-by-step guide to repairing ductwork in older homes covers materials, sealing methods, and what to expect.
Use this table to review the main options:
| Condition found | Action | Note |
|---|---|---|
| Suspected asbestos, mold, pest debris, or damaged liner | Stop and call a qualified professional | Assess hazards before disturbing the material |
| Crushed, disconnected, or torn run | Repair or replace the affected section | A filter change will not fix physical damage |
| Leaking joints with sound metal | Seal joints and restore insulation where needed | Use materials rated for the duct application |
| Deteriorated or water-damaged duct board | Evaluate the section for replacement | Find and correct the moisture source |
| Duct system undersized for current equipment | Measure airflow and plan needed duct changes | Check return capacity and verify performance after sealing |
| Intact ducts with light dust | Maintain filters, clean registers, and service equipment as needed | Dust alone does not establish a need for duct cleaning |
HVAC Replacement in Older Homes: How Ductwork Affects the Decision
Sometimes the equipment works properly, but duct problems leave the house uncomfortable. Other times the ducts are sound and the equipment needs repair or replacement. Check both before committing to major work.
If existing ducts cannot support the proposed equipment's airflow needs, plan duct modifications and equipment selection together. Sound, properly sized ducts may not need replacement at all. Equipment efficiency ratings alone do not tell you whether the ducts are suitable.
Weighing your options? Our HVAC repair vs. replacement guide explains the trade-offs.
How to Check the Finished Work
Ask for before-and-after photos of repaired areas and a written explanation of the work. Confirm that opened joints were sealed and disturbed insulation was restored. Feeling air at a register can reveal an obvious problem, but it does not replace measured airflow checks.
Use this checklist:
- Before-and-after photos of registers and repaired areas
- Repaired connections properly sealed
- Attic ducts properly supported and insulation restored
- Filter checked for correct size, type, and condition
- Room-by-room airflow checked and system performance verified
- Written summary of the repairs and any remaining concerns
Watch room temperatures and system operation after the work. Energy bills can provide context, but weather and household habits affect them, so they are not proof of repair quality. Our guide to safely checking an old HVAC system explains what else to watch for.
Schedule a Duct and System Evaluation
If your Jefferson County home has uneven temperatures, whistling registers, or weak airflow, contact Ricotta Heating & Air about an evaluation of the ducts and equipment together.
Ask which findings support a repair, whether duct sizing is affecting airflow, and what can remain in place. Those answers help you decide what work is needed.
You can request a service appointment online before the next heating or cooling season.
Older ductwork does not automatically need replacement. Start with its condition, the system's airflow needs, and any safety concerns—not its age alone.
Frequently Asked Questions
What should homeowners check in the ductwork of a mid-century home?
Check accessible registers and exposed ducts for rust, separated joints, sagging, crushed sections, and visible gaps. Note rooms that do not heat or cool well, and photograph what you can see safely. Do not disturb old duct wrap, tape, damaged liners, or suspected contamination. Have those materials assessed before any repair work.
How can you tell whether older ductwork is leaking?
Possible signs include uneven temperatures, dust streaks near joints, whistling registers, and unexplained increases in energy use. Visible gaps, separated seams, or torn flexible duct are stronger clues. These symptoms can have other causes, so a technician may use duct leakage testing and airflow measurements to confirm the problem.
Should ductwork be evaluated before replacing an older HVAC system?
Yes. Have the ducts checked for condition, leakage, and airflow capacity before selecting equipment. New equipment may not solve comfort problems caused by undersized or poorly routed ducts. An evaluation helps determine which sections can stay and which need sealing, repair, or redesign.
When should older ductwork be inspected by an HVAC professional?
Call if you see rust holes, crushed or disconnected runs, or rooms that consistently miss the thermostat setting. An inspection also makes sense before equipment replacement or after remodeling that changes walls, registers, or return paths. Musty odors and signs of moisture need attention, too. A technician can assess accessible sections and explain whether additional access or a specialist is needed.

This article was written with AI assistance and edited for Hillsboro and Jefferson County homeowners by Ricotta Heating & Air. For advice about your own system, call (314) 333-5900.