
Ductwork Repair for Older Homes | Jefferson County, MO
Table of Contents
- Why 1950s Ductwork Requires a Different Approach
- Common Ductwork Problems in Older Homes
- How to Find Duct Leaks in Your Older Home
- Step-by-Step Repair Process for Old Ductwork
- Step 1: Identify Duct Materials Before You Touch Them
- Step 2: Turn Off the System and Confirm It Is Safe to Work
- Step 3: Seal Accessible Joints with Mastic
- Step 4: Reconnect Loose Sections with Screws and Mastic
- Step 5: Insulate Exposed Ducts in Unconditioned Spaces
- Step 6: Test the Repairs and Measure the Results
- When to Replace Ductwork Instead of Repairing It
- Cost to Replace Ductwork in an Older Home
- Frequently Asked Questions
Why 1950s Ductwork Requires a Different Approach
If you own a 1950s home in Hillsboro, MO, check the duct materials and condition before starting repairs. Older systems may have different connections, insulation, and return-air paths than those used today.
Age alone does not mean the whole system needs replacing. Sound metal ducts with a few loose joints may be repairable. The first step is knowing what you can safely handle and what needs professional attention.
Equipment replacements and room additions can also leave older ductwork poorly matched to the current system. Sealing leaks helps, but it will not correct every airflow balance problem.
Common Ductwork Problems in Older Homes
Loose joints, corrosion, and restricted airflow can develop as ductwork ages. Several problems may be present at once.
Loose Connections and Disconnected Sections
Vibration, settling, and deteriorating seals can loosen duct connections, especially where sections lack proper fasteners or supports.
A disconnected return duct can draw air from an attic, crawl space, or wall cavity into the system. That can bring dust and unconditioned air into your home.
Look for gaps where sections meet. Whistling, hissing, or air movement near an accessible joint may also point to a leak. Do not touch old insulation or joint coverings until you know they are safe.
Leaking Ducts and Deteriorating Materials
Moisture can corrode galvanized steel ducts. Small holes, flaking metal, and damp insulation deserve a closer look, along with the source of the moisture.
Leaks are not the only concern. If you find contamination or suspect moisture damage, review the EPA’s guidance on air duct cleaning before deciding what work is needed.
Older duct insulation, joint tape, and related materials may contain asbestos. Leave suspect materials undisturbed until a qualified professional assesses them.
Uneven Airflow and Blockages
A room that stays too hot or too cold may have a duct leak, restricted airflow, or a poorly sized supply or return. Insulation, windows, and sun exposure can also affect room temperatures.
Debris or pest nests can block ducts. Stored items or work on other systems can crush or disconnect sections, while undersized returns can restrict airflow throughout the house.
How to Find Duct Leaks in Your Older Home
For an older Jefferson County home, start with a visual check of safely accessible ducts. This can reveal obvious damage, though hidden leaks usually need professional testing.
Visual Inspection Techniques
Use a flashlight to inspect visible ducts in the basement, attic, or crawl space without disturbing insulation. Avoid areas with exposed wiring, unstable footing, or suspect materials.
Look for these signs:
- Disconnected or separated joints: Gaps between sections allow air to escape or enter the system.
- Rust or corrosion: Flaking metal and holes suggest deterioration. Surface discoloration needs closer inspection.
- Damaged insulation: Torn, missing, or compressed duct wrap can increase heat transfer and allow condensation on cold ducts.
Take photos and note problem locations without marking or handling suspect insulation.
Smoke Testing and Airflow Assessment
A technician can use a smoke pencil or duct leakage equipment to investigate leaks. Do not use an open flame or burning material to test ductwork.
Compare airflow at supply registers while the system runs. Weak flow is a useful clue, but airflow does not need to feel identical at every register, and a hand check cannot confirm that a duct is leak-free.
Use the same thermometer to compare room temperatures under similar conditions. Persistent differences call for a closer look; they do not prove that the ducts are the cause.
Step-by-Step Repair Process for Old Ductwork
Start by identifying materials and hazards. These steps apply to accessible, sound metal HVAC ducts—not exhaust flues, damaged flexible ducts, or materials that may contain asbestos.
Step 1: Identify Duct Materials Before You Touch Them
An older home may contain original ducts and later additions. The repair method depends on the material and its condition.
- Rigid galvanized steel: Look for metal sections with folded seams and mechanical connections. Have flaking rust or perforated metal assessed before attempting a patch.
- Flexible duct: Later modifications may include flexible duct with a wire-supported inner liner. Brittle, torn, or crushed sections may need replacement rather than patching.
- Wall-cavity and panned returns: Some homes use stud or joist cavities as return-air paths, with sheet metal enclosing part of the space. These can leak and are best evaluated by a technician before modification.
Step 2: Turn Off the System and Confirm It Is Safe to Work
Turn the system off at the thermostat and disconnect power using the appropriate service disconnect or breaker. Make sure no one restores power while you work. Confirm the blower has stopped and hot components have cooled; if you cannot verify safe conditions, call a technician.
Before opening or fastening anything, check these three things:
- You are working on an air duct, not a combustion vent. Furnace and water-heater flues carry exhaust gases. Damaging or blocking them can create a carbon monoxide hazard. If you cannot identify the duct or vent, stop.
- No wiring is in the work area. Check for electrical wiring near the duct and behind any planned fastener location. Do not drill or cut where you cannot see what is behind the metal.
- No framing needs to be altered. Panned returns may use wall or floor cavities. Do not cut or remove structural members to reach a duct.
Step 3: Seal Accessible Joints with Mastic
Use duct-sealing mastic approved for the material and application. Ordinary cloth-backed duct tape is not a durable duct seal. Work only on sound metal you can safely reach.
- Clean and dry the joint according to the sealant instructions, but only after ruling out suspect coatings or tape.
- Apply mastic across the seam at the thickness specified by the manufacturer. Use approved reinforcing mesh where required.
- Allow the sealant to cure as directed before operating the system or covering the repair.
Do not rely on mastic to restore rusted metal. Have a technician assess holes and weakened sections to determine whether a mechanically secured patch or replacement is appropriate.
Step 4: Reconnect Loose Sections with Screws and Mastic
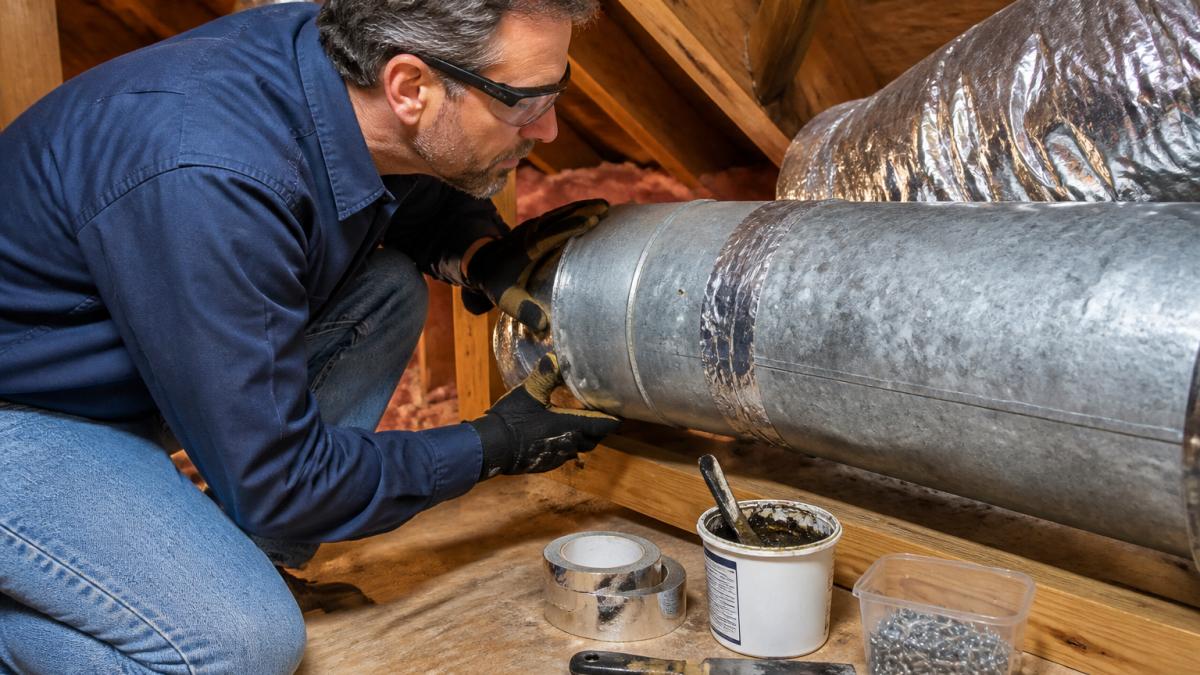
For accessible rigid metal ducts, realign separated sections and secure them using fasteners appropriate to the joint and local requirements. Seal the connection with approved mastic. Correct missing supports rather than forcing a sagging duct back into place.
Remove old tape only after confirming it is safe to disturb. Flexible ducts and duct board require different connection methods; do not apply rigid-metal repair instructions to them.
Step 5: Insulate Exposed Ducts in Unconditioned Spaces
Missouri’s humid summers make condensation on cold ducts a concern, while cold winters increase heat loss from ducts outside conditioned rooms. After fixing leaks and moisture problems, insulate exposed supply and return ducts as required for their location. Follow the insulation manufacturer’s instructions and local code for insulation value, fastening, and vapor-barrier sealing. Do not cover wet insulation or suspect asbestos materials.
Step 6: Test the Repairs and Measure the Results
Once repairs are complete, sealant has cured, and the work area is clear, restore power and run the system. Check:
- Register airflow: Confirm that each supply register delivers air. Note any rooms that still have weak flow.
- Room temperatures: Compare rooms under similar operating conditions and record persistent comfort problems.
- System operation and noise: Listen for new whistling, rattling, or unusual cycling. Shorter cycles alone do not prove that repairs worked.
A technician can compare duct leakage measurements before and after repairs using a calibrated fan and pressure gauge. Airflow and system pressure checks can help identify remaining restrictions.
When to Replace Ductwork Instead of Repairing It
A patch makes sense only when the surrounding duct is sound. Replacement may be the better choice for damaged sections or a system that cannot deliver the airflow your equipment needs.
Consider replacement when you find:
- Extensive corrosion: Flaking metal and widespread holes leave little solid material for a lasting repair.
- Repeated disconnections: Multiple loose sections call for an assessment of supports, connections, and layout—not just more sealant.
- Crushed sections: Badly deformed ducts can restrict airflow and may need replacement.
Compare the scope of repairs with the condition of the rest of the system. Neither repair nor replacement comes with a predictable service life based on age alone.
Cost to Replace Ductwork in an Older Home
For Jefferson County homeowners, a useful estimate starts with an inspection of the actual duct routes. An open-basement installation is a different project from one behind finished walls or in a tight crawl space.
The main factors affecting the work include:
- Accessibility: Limited clearance and finished surfaces can add removal, access, patching, and painting work.
- Configuration: The number, length, and layout of duct runs affect materials and installation labor.
- Material: Rigid metal and flexible duct have different installation requirements. The choice should suit the space and airflow design.
Ask for written estimates that separate materials, labor, sealing, insulation, testing, and any required asbestos assessment or abatement. Confirm who handles repairs to walls and ceilings.
Repair or Replace? How to Decide
Look at the whole system rather than relying on one rule of thumb:
- Extent of damage: Isolated loose joints and small leaks may be repairable. Widespread corrosion or badly crushed sections may call for replacement.
- Accessibility: Reachable ducts are easier to repair. For concealed runs, compare repair access with rerouting options.
- System compatibility: Sealing cannot correct undersized ducts. A technician should check airflow needs before recommending changes to supplies, returns, or the overall layout.
Retrofit Options When the Original Route Is Inaccessible
New ducts do not always have to follow the original route. Options include:
- Sealing from the inside: Professional aerosol sealing can close certain leaks from inside the system. It does not reconnect separated ducts or repair structural damage, and the system must be assessed for suitability first.
- Rerouting through accessible spaces: New trunk and branch ducts may fit in a basement or attic rather than existing wall cavities. Some routes require new soffits or ceiling work.
- Zoning or a ductless supplement: A ductless system may help serve a hard-to-reach room. Zoning requires a compatible system and careful airflow design; adding a damper alone is not a reliable fix.
What to Expect During the Work
Ask how long the heating or cooling system will need to be off and how the work area will be protected. If access requires opening walls or ceilings, plan for patching and painting afterward.
Ricotta Heating & Air is a family-owned company based in Hillsboro, serving Jefferson County and South St. Louis County. Contact us to schedule an estimate and discuss whether repairs, replacement sections, or a layout change make sense for your home.
Frequently Asked Questions
Can old ductwork be repaired, or does it need to be replaced?
Older ducts can often be repaired when the metal is sound and problems are limited to loose connections, small leaks, or missing insulation. Widespread corrosion, damaged sections, or an undersized layout may require replacement or redesign. An inspection can help separate repairable problems from those that need more work.
How do you find leaks in old ductwork?
Look for visible gaps, separated sections, and damaged insulation without disturbing suspect materials. Air movement or whistling near a joint may indicate a leak. A technician can use a smoke pencil or a dedicated duct leakage tester to investigate leaks that are harder to find.
Is it safe to use old ductwork with a new HVAC system?
Existing ducts may work with new equipment if they are in good condition, properly sized, and free of unresolved hazards. Before installation, have a technician check the duct layout, leakage, airflow capacity, and return-air paths. Age alone does not determine whether the ducts need replacing.
How can you improve airflow through ductwork in a 1950s home?
Start by keeping registers and returns clear and checking the air filter. Have leaks, disconnected sections, and blockages addressed after suspect materials are assessed. A technician can measure airflow and system pressure, adjust balancing dampers where appropriate, and determine whether supply or return ducts need resizing. Insulation helps control heat transfer but does not correct restricted airflow.
This article was written with AI assistance and edited for Hillsboro and Jefferson County homeowners by Ricotta Heating & Air. For advice about your own system, call (314) 333-5900.