
Duct Leak Inspection and Repair | Jefferson County, MO
Quick Summary
Start by checking accessible ductwork for separated joints, holes, and crushed sections. Small leaks in sound metal ducts may be sealed with an approved duct sealant. Flexible ducts need repairs matched to the damaged layer; taping the outer jacket won't fix a torn inner liner. Widespread deterioration may call for replacement.
- Older ductwork can develop loose connections, damaged insulation, and airflow restrictions.
- Warning signs include uneven room temperatures, weak airflow, unexplained increases in energy use, and noisy ducts.
- Use duct mastic or tape approved for the duct material, not ordinary cloth-backed duct tape.
- Repair isolated damage when the surrounding material is sound. Consider replacing sections that are badly deteriorated or collapsed.
- If you suspect asbestos-containing wrap or tape, leave it undisturbed and have it assessed before work begins.
Table of Contents
- Why Ductwork in Older Homes Needs Attention
- Signs Your Ductwork Needs Repair
- How to Inspect Ductwork in Older Homes
- How to Fix Leaky Air Ducts
- Ductwork Repair vs. Replacement: Making the Right Choice
- Cost to Repair Ductwork: What Affects Your Estimate
- Ductwork Insulation for Older Homes
- When to Call a Professional
- Frequently Asked Questions
Why Ductwork in Older Homes Needs Attention
In older Hillsboro homes and throughout Jefferson County, duct condition deserves a look before you blame the furnace or air conditioner for uncomfortable rooms.
Connections can loosen, materials can deteriorate, and insulation can pull away. Leaks let heated or cooled air escape before it reaches your rooms, making it harder for the system to maintain the thermostat setting.
Many duct problems can be repaired without replacing the whole system. The first step is finding out what's damaged and whether the surrounding material is still sound.
Signs Your Ductwork Needs Repair
Visual indicators in attics and crawl spaces
Look at exposed ducts only where you have safe access and solid footing. Don't crawl into a hazardous space just to check a connection.
Watch for these warning signs:
- Separated joints: Sections have pulled apart.
- Holes or tears: Openings are visible in metal or flexible ducts.
- Crushed or collapsed areas: Pinched or flattened ducts restrict airflow.
Performance issues in your HVAC system
Duct problems aren't always visible. Pay attention to how air reaches each room.
- Uneven temperatures: Some rooms stay warm while others stay cold.
- Weak airflow: Little air comes from one or more registers.
- Higher energy use: Heating or cooling use rises without an obvious change in weather or household habits.
Leaky or restricted ducts can cause these symptoms, but so can a dirty filter, equipment trouble, or poor system sizing. An inspection helps separate those possibilities.
How to Inspect Ductwork in Older Homes
Work through the accessible parts of the system in order. A few photos and notes will help a technician understand what you've found.
Step 1: Map the system before you touch it
Start near the furnace or air handler and trace visible main ducts, branches, and registers. Note connections serving additions, converted garages, or finished basements. Record whether each section is galvanized steel, insulated flexible duct, or fiberglass duct board; each material needs a different repair method.
Step 2: Identify older materials
Identify the duct material before touching insulation or attempting a repair.
- Galvanized steel: Check for loose joints, open seams, and corrosion.
- Fiberglass duct board: Look for torn foil facing, crushed areas, moisture damage, or crumbling material.
- Insulated flexible duct: The outer jacket can hide damage to the inner air-carrying liner.
You cannot reliably identify asbestos by appearance alone. If old wrap or tape raises concerns, leave it undisturbed and contact a qualified asbestos professional.
Step 3: Inspect safely
Attics and crawl spaces may contain exposed wiring, sharp metal, low framing, unsafe footing, standing water, or mold. Turn the HVAC system off before touching ducts or making repairs. Do not open equipment cabinets.
Know the difference between air-distribution ducts and combustion venting. Never tape, block, or alter a furnace flue, water-heater vent, or combustion-air opening. Improper venting or air supply can create a carbon monoxide hazard. If you're unsure what a pipe or opening does, leave it alone and call a technician. See the EPA's carbon monoxide safety guidance.
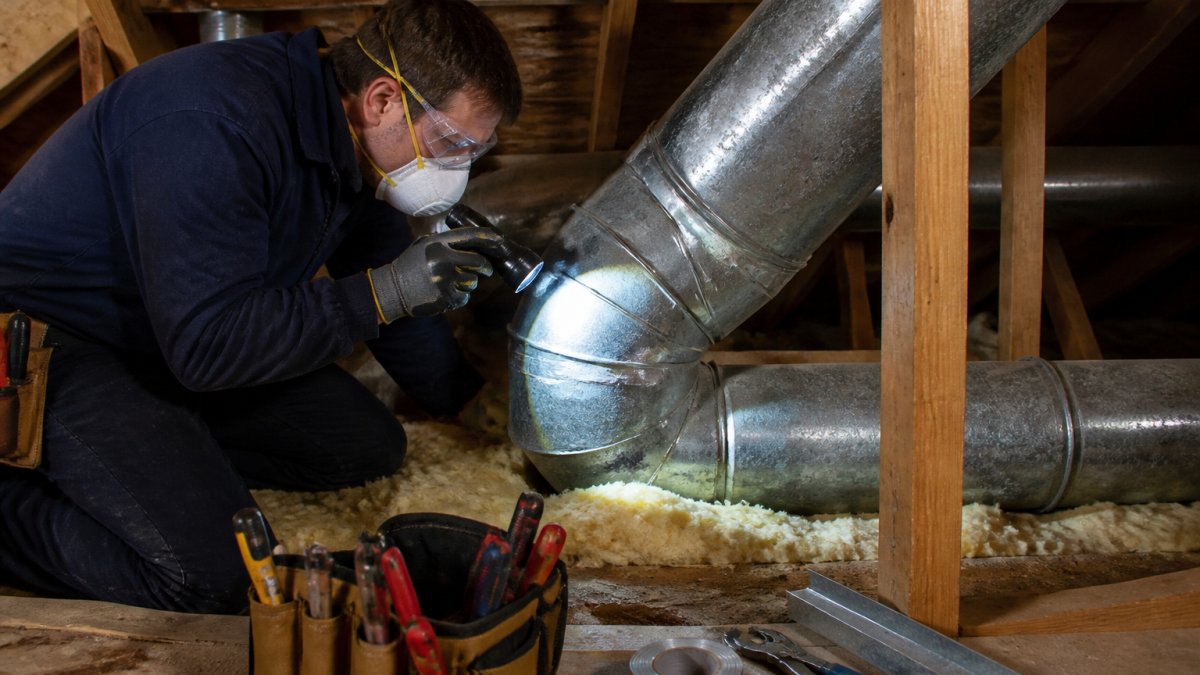
Step 4: Check accessible ductwork
Check and record the following without pulling apart ducts or insulation:
- Joints and seams: Look for separated connections, loose fasteners, and cracked or missing sealant.
- Flexible ducts: Look for torn jackets, sagging runs, and sharp bends. Don't assume the inner liner is intact because the jacket looks fine.
- Insulation: Look for gaps, compression, dampness, and damaged vapor barriers.
Step 5: Check for leaks
With the system running, you may be able to feel escaping air by holding your hand near an accessible supply-duct seam. Keep clear of hot surfaces, wiring, and moving parts. This check won't find every leak, especially on return ducts. A professional duct leakage test uses a calibrated fan to measure leakage and compare results before and after repairs.
Step 6: Document and prioritize
Photograph problems and note their locations. Address safety concerns first, followed by major disconnections, collapsed sections, smaller leaks, and insulation damage.
If access is unsafe or you find suspected asbestos, significant moisture damage, or a combustion-venting concern, stop and bring in the appropriate professional.
How to Fix Leaky Air Ducts
Sealing split seams and joints
A small, accessible seam leak in sound metal ductwork may be a homeowner repair. Separated connections must be secured correctly before sealing; mastic is not a structural repair.
For a minor seam leak:
- Prepare the area: Turn off the system and remove dust and loose debris without disturbing suspect materials.
- Choose the sealant: Use duct mastic approved for the duct material and follow its label instructions.
- Cover the gap: Apply the specified thickness and use approved reinforcing mesh if the product instructions require it.
- Allow proper drying: Follow the manufacturer's curing and system-restart directions.
- Check the repair: After the system can safely restart, check for remaining leakage.
Ordinary cloth-backed duct tape is not a dependable permanent seal. Use products specifically approved for the application.
Severely rusted metal needs assessment and likely section replacement. Adding tape over mastic won't restore weakened metal.
Patching flexible ducts
Flexible duct has an inner liner, insulation, and an outer jacket. A repair must address the damaged layer. An outer-jacket patch alone cannot stop a leak in the inner liner.
For a small outer-jacket tear with dry, intact insulation and no suspected liner damage:
- Identify the damage: Inspect the visible tear without cutting the jacket open. Leave hidden liner damage to a technician.
- Clean the surface: Follow the repair product's instructions for cleaning and drying.
- Select a patch: Use tape or a repair product approved by the duct manufacturer for that jacket.
- Apply it as directed: Use the specified overlap and smooth the patch against the jacket.
- Check the edges: Make sure the patch adheres fully and restores the jacket's vapor barrier.
Have a technician assess torn inner liners, wet insulation, and heavily damaged sections. Don't rely on a surface patch for these problems.
Use this table to compare common repairs:
| Problem | Repair Method | Key Step | Drying or Completion Time |
|---|---|---|---|
| Minor seam leaks in sound metal | Approved duct mastic | Secure the connection and follow sealant instructions | Follow the product's curing directions |
| Small flexible-duct jacket tear | Manufacturer-approved jacket patch | Confirm there is no suspected liner damage or wet insulation | Follow the repair product's instructions |
| Severely corroded joints | Professional assessment and section replacement as needed | Do not rely on sealant to strengthen damaged metal | Depends on access and repair scope |
Ductwork Repair vs. Replacement: Making the Right Choice
Compare four things: the duct material, the extent of damage, access, and measured performance. Age alone doesn't settle the question.
Factor 1: Material
The material and its condition determine which repairs will hold.
- Rigid galvanized steel: Sound sections can often be resealed, while damaged sections can be replaced individually.
- Duct board: Sound joints may be repairable, but crushed, wet, or crumbling board may need replacement.
- Flexible duct: Minor jacket damage may be repairable. Failed liners or collapsed sections often require replacement; sagging or sharp bends may call for support or routing corrections.
Factor 2: Extent of damage
A few leaking connections usually point toward repair. Widespread corrosion, failed liners, or repeated disconnections deserve a broader assessment.
Compare repairing individual defects with replacing the affected branch or main duct. You may not need to replace the entire system.
Factor 3: Accessibility
Exposed basement ducts are generally easier to work on than ducts behind finished ceilings or in tight crawl spaces. If opening a wall or ceiling is necessary, ask whether replacing the damaged run would avoid repeated access work.
Factor 4: Measured performance
Leakage testing, airflow checks, and pressure measurements help explain why rooms are uncomfortable. High leakage may call for sealing rather than replacement. Poor airflow may also involve duct sizing, restrictions, filters, or equipment problems.
A simple decision path
- Address safety concerns, including suspected asbestos, combustion venting, mold, or standing water, before planning repairs.
- Repair and seal isolated damage when the surrounding duct material is sound.
- Compare repair and replacement options when damage is widespread or access is difficult.
- Use measured leakage and airflow results to decide whether sealing, insulation, layout changes, or replacement will address the problem.
- If equipment replacement is also planned, coordinate duct sizing with the new system. Manual J load calculations help determine the home's heating and cooling needs.
Ask for a written explanation of the duct condition, recommended work, and any test results. Confirm whether testing is included in the assessment.
For Jefferson County homeowners planning an HVAC upgrade, checking the ducts at the same time helps avoid leaving airflow problems unresolved.
Cost to Repair Ductwork: What Affects Your Estimate
A useful estimate explains what needs work and how the technician will reach it.
- Accessibility: Finished surfaces and tight spaces can add labor.
- Extent of damage: Sealing a few joints is different from replacing several damaged runs.
- Duct material: Metal, duct board, and flexible duct require different materials and repair methods.
Request a written scope that separates sealing, section replacement, insulation, testing, and any access or finish work.
Compare what each option actually fixes. A patch that leaves the underlying airflow or moisture problem unresolved may lead to more work later.
Ductwork Insulation for Older Homes
Missouri's humid summers and cold winters make duct insulation especially relevant in unconditioned attics and crawl spaces. It limits heat transfer, while an intact vapor barrier helps keep humid air from reaching cold duct surfaces.
Insulation helps with:
- Temperature control: Ducts outside conditioned rooms can lose heat in winter and gain it in summer.
- Condensation control: Proper insulation and a sealed vapor barrier help prevent sweating on cold ducts.
- Noise control: Some insulation materials can reduce duct noise, though they won't fix loose metal or airflow restrictions.
Check for loose wrap, compressed insulation, exposed sections, and damp spots. Find and correct the source of moisture before covering damaged areas.
Seal duct leaks before adding insulation. Use insulation suitable for the location and maintain a continuous vapor barrier according to the product instructions. Leave suspected asbestos materials undisturbed.
When to Call a Professional
A small, accessible leak may be manageable. Hidden damage, hazardous materials, and system-wide airflow problems need professional attention.
Call a professional if:
- Access is unsafe: The space has unstable footing, standing water, exposed wiring, or suspected mold or asbestos.
- Damage is extensive: You find large holes, widespread corrosion, collapsed runs, or multiple disconnected sections.
- Testing is needed: Comfort problems persist, or you suspect leaks and restrictions in concealed ducts.
Request an estimate to discuss your ductwork concerns and system options.
Ricotta Heating & Air is a family-owned company based in Hillsboro, serving Jefferson County and South St. Louis County. Tell us which rooms are uncomfortable and what you've noticed at the vents.
Older ductwork doesn't automatically need replacement. Start with a safe inspection, repair sound materials where practical, and get help when the damage or access is beyond a simple repair.
Frequently Asked Questions
How do you find leaks in old ductwork?
Look at safely accessible ducts for holes, open seams, disconnected sections, and deteriorated seals. You may feel escaping air near supply-duct joints while the system runs, but that won't reveal every leak. A technician can use duct leakage testing and other diagnostic checks to find less obvious problems. Don't disturb old wrap or tape that may contain asbestos.
Can old ductwork be repaired, or does it need to be replaced?
Small leaks and loose connections can often be repaired when the surrounding material is sound. Extensive rust, failed flexible-duct liners, or collapsed sections may require replacement. Age alone isn't the deciding factor. Condition, access, and airflow measurements help determine the right approach.
What materials are safe for sealing duct leaks?
Use duct mastic or sealing tape approved for the specific duct material and application. Ordinary cloth-backed duct tape is not a dependable permanent repair. Flexible-duct liners and jackets may require different products, so follow the duct manufacturer's instructions. Never use air-duct sealants to repair combustion flues or vents.
When should old ductwork be replaced instead of repaired?
Consider replacing sections with severe corrosion, failed liners, collapse, or damaged duct board. Insulation damage alone may only require insulation replacement once any moisture problem is corrected. Persistent hot and cold spots call for airflow and design checks before replacing ducts. Ask for repair and replacement options based on the actual condition of the system.

This article was written with AI assistance and edited for Hillsboro and Jefferson County homeowners by Ricotta Heating & Air. For advice about your own system, call (314) 333-5900.