
Ask for These Readings: St. Louis HVAC Maintenance Checklist
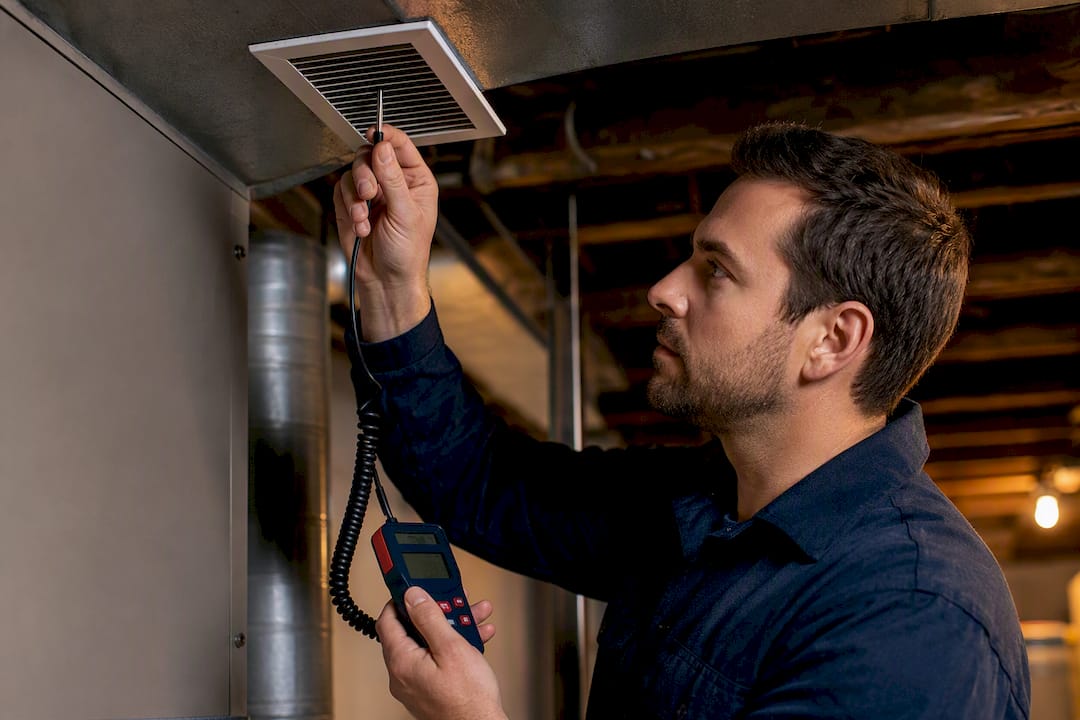
Check your filter every month and replace it at least every three months, clear two to three feet around your outdoor unit, and book two professional tune-ups a year, one in spring for cooling and one in fall for heating. Homeowners handle the filter checks, thermostat programming, and basic clearance work. Everything involving refrigerant, combustion, or live electrical testing belongs to a licensed technician. That split, simple monthly habits plus seasonal professional visits, is the entire system.
TL;DR:
- Regular filter checks and replacements are essential, with a three-month minimum interval, especially in homes with pets or high dust levels.
- Spring and fall professional tune-ups should include precise measurements such as refrigerant pressure, airflow, and electrical readings, not just visual inspections.
- Fall maintenance prioritizes safety checks for combustion systems, including heat exchanger inspections and carbon monoxide detector testing, to prevent dangerous leaks.
- Homeowners can handle basic tasks like clearing debris around outdoor units and programming thermostats, but refrigerant, electrical, and combustion work require licensed technicians.
- Using official checklists from ENERGY STAR or PNNL helps ensure maintenance is thorough and consistent across multiple systems or properties.
Table of Contents
- Spring HVAC Maintenance Checklist: What to Do Before Summer
- Fall Heating Checklist: Safety Checks Before Cold Weather Hits
- Your Monthly, Quarterly, and Annual HVAC Maintenance Schedule
- What Should Be in a Professional HVAC Tune-Up?
- When Should You Call an HVAC Technician Immediately?
- Hiring an HVAC Contractor: What to Verify and What to Expect
- DIY vs Professional HVAC Maintenance: Where to Draw the Line
- Ricotta Heating & Air: What Our Tune-Up Actually Delivers
- How to Spot Early HVAC Problems Between Tune-Ups
- Thermostat Calibration and Settings: What to Check
- Cleaning Vents and Registers: A Simple but Often Skipped Task
- Maintaining Humidifiers and Dehumidifiers Connected to Your HVAC System
- Seasonal Maintenance Differences by System Type
- Keep It Simple, Measure Everything, and Question Vague Answers
- Book Your Seasonal Tune-Up With Ricotta Heating & Air
- Where to Find Official HVAC Maintenance Checklists
- Sources
- FAQ
Spring HVAC Maintenance Checklist: What to Do Before Summer
Warm weather in St. Louis County shows up fast, and an air conditioner that sat idle since October needs attention before it gets pushed to full capacity. ENERGY STAR recommends scheduling the cooling check in spring, timed before the pre-summer rush when every contractor’s schedule fills up.
Here’s what you can knock out yourself in under an hour:
- Clear two to three feet of space around your outdoor condenser, pulling back mulch, leaves, dryer vent lint, and overgrown shrubs.
- Rinse dirt and cottonwood fluff off the condenser fins with a garden hose, spraying from the inside out if you can access it.
- Check that the unit sits level. A tilted pad can strain the compressor over time.
- Wipe down the condensate drain line access point and look for standing water or algae buildup.
- Set your thermostat’s cooling schedule, or reprogram a smart thermostat for the season ahead.
Coil cleaning is where DIY often stops. Surface rinsing the condenser coil is fine for a homeowner. Deep cleaning the evaporator coil inside the air handler usually means pulling an access panel and using a coil cleaner or steam equipment, and most technicians treat that as a paid line item rather than a freebie bundled into a basic visit.
During a spring tune-up, a technician checks refrigerant charge by measuring the temperature split, the difference between the air going into your return and the air coming out of your supply vents. A healthy split usually falls between 16 and 22 degrees Fahrenheit, though the exact target depends on your system’s design and the humidity that day. A split that’s too narrow often points to airflow restriction. Too wide can signal low refrigerant or a dirty coil.
Statistic Callout: Dirty or neglected filters and coils are among the leading causes of poor HVAC efficiency, according to ENERGY STAR, which is exactly why the spring visit exists.
The condensate drain deserves more attention than most homeowners give it. Algae growth clogs the line, and a clogged line backs water up into your air handler, sometimes right through your ceiling if the unit sits in an attic. A tech should flush the line and can recommend algae tablets to keep it clear between visits. If your thermostat isn’t smart yet, spring is a reasonable time to upgrade. A programmable or smart model that adjusts for St. Louis’s mid-day heat swings can shave real dollars off summer bills without you thinking about it daily.
Fall Heating Checklist: Safety Checks Before Cold Weather Hits
Fall maintenance carries more safety weight than spring maintenance, because you’re dealing with combustion, flue gas, and in older homes, aging heat exchangers. ENERGY STAR recommends the heating check in fall, and timing it around the switch back to standard time in November gives you a built in reminder before overnight temperatures drop into the 30s.
Your pre-winter walk-through should include:
- A visual check of the flue pipe for rust, gaps, or disconnected joints where it exits the furnace and runs to the chimney or exterior wall.
- Listening for unusual rattling or grinding when the furnace first kicks on for the season.
- Testing your carbon monoxide detectors and replacing batteries if it’s been a year.
- Confirming vents and returns throughout the house are open and unblocked by furniture or rugs.
- Checking that outdoor heat pump units are clear of leaves and debris the same way you’d clear an AC condenser.
A technician’s fall visit goes deeper than a visual scan. Inspecting the heat exchanger for hairline cracks matters because a cracked exchanger can leak combustion gases, including carbon monoxide, into your ductwork. Combustion analysis measures the gas mixture coming off the burners to confirm complete, clean combustion rather than a flame that’s running rich or starved for air. Techs also check electrical connections for corrosion and test the blower motor’s amp draw against the manufacturer’s rated spec, since a motor working harder than it should is often the first sign of a bearing failure a few months out.
Statistic Callout: ENERGY STAR’s maintenance guidance ties seasonal scheduling directly to avoiding peak contractor demand, meaning the homeowners who book fall visits in September or early October get more flexible scheduling than those who wait for the first cold snap.
Heat pumps add a couple of fall-specific items. A tech should run a reversing valve test to confirm the system switches cleanly between cooling and heating mode, since a sticking valve is a common source of a heat pump that blows cold air when it should be heating. If you’re running a dual-fuel system, pairing a heat pump with a gas furnace, this is also when you confirm the changeover temperature is programmed correctly so the system doesn’t run the more expensive fuel source longer than it needs to.
Your Monthly, Quarterly, and Annual HVAC Maintenance Schedule
A runnable maintenance schedule beats a vague intention to “check the system sometime.” Break it into three rhythms and it stops feeling like a chore.
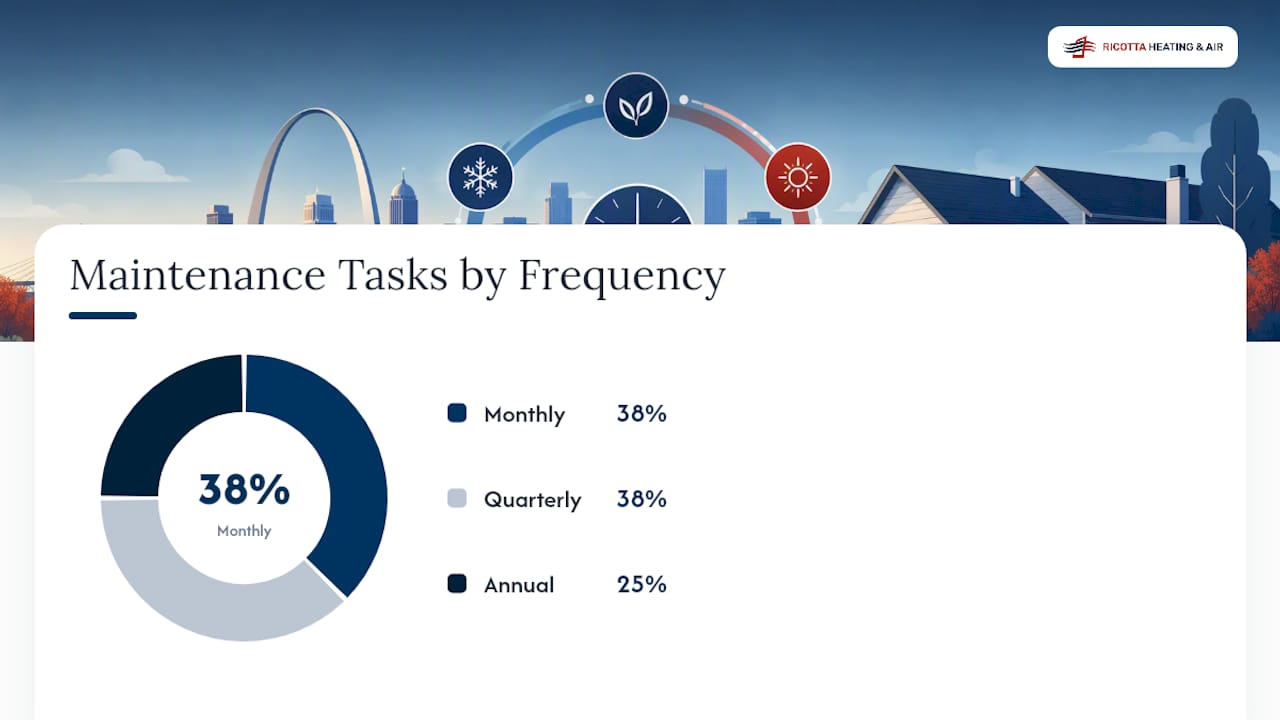
- Monthly: Hold your filter up to a light. If you can’t see light through it clearly, replace it. Walk your outdoor unit and clear anything within two feet. Glance at supply vents and returns to confirm nothing’s blocked.
- Quarterly: Pull an air handler access panel and check the condensate drain for slow flow or algae film. Test your thermostat’s batteries if it’s not hardwired. Look at accessible duct boots, the metal connections where ducts meet vents, for gaps or disconnection.
- Annually: Book your spring cooling tune-up and fall heating tune-up. Start or update a simple maintenance log with dates, filter changes, and any measurements your technician gave you.
You don’t need a toolbox. A flashlight, a basic screwdriver for filter housings and access panels, a soft coil brush, and a garden hose cover nearly everything on the homeowner side of this list.
Pro Tip: Write your filter size on your phone’s notes app the first time you check it. It sounds trivial, but standing in a hardware store aisle guessing between 16x25x1 and 20x25x1 wastes more trips than anything else on this list.
The PNNL sample checklist for unitary HVAC equipment organizes tasks the same way, by frequency, which is worth borrowing if you manage more than one property or a larger home with multiple systems.
What Should Be in a Professional HVAC Tune-Up?
A tune-up that consists of a technician glancing at your unit and telling you “looks good” isn’t a tune-up. It’s a wasted service call. A proper visit produces numbers, not impressions, and ENERGY STAR’s own maintenance guidance lists specific technical items a legitimate visit should cover.
Electrical work comes first. Loose connections are a leading cause of premature component failure, so a technician should tighten every accessible connection and then test voltage and amperage against the equipment’s rated specs. A capacitor that’s a few degrees warm or a contactor with visible pitting on the contacts often shows up here before it ever causes a no-cool call.
Performance measurement comes next. This is where refrigerant pressures, temperature split, and airflow get checked against manufacturer specifications. If your system has been sluggish or your energy bills crept up without an obvious cause, a static pressure test can reveal duct restriction that a visual inspection would miss entirely.
Here’s what a documented visit should include:
- Tightened electrical connections with voltage and amperage readings recorded.
- Refrigerant pressure and temperature split measurements against the manufacturer’s target range.
- Blower motor inspection, including belt condition on older systems and amp draw comparison.
- Capacitor and contactor visual and electrical checks.
- Combustion analysis and heat exchanger inspection on gas and oil furnaces.
- Condensate drain flow test and clearing if needed.
Statistic Callout: The U.S. Department of Energy’s Better Buildings program estimates that consistent operations and maintenance practices can save 5 to 20% annually on energy costs, a range wide enough to depend heavily on how neglected the system was beforehand.
What you should walk away with is a written report, not a verbal summary you’ll forget by dinner. That report should list the actual measurements taken, ideally with photos of anything concerning, and a recommended timeline if a repair is coming. A worn capacitor testing at the edge of its rated microfarad range isn’t an emergency, but it’s worth knowing about before it fails on the hottest day in July. That’s the real value: a tune-up is an evaluation with a paper trail, and the deep cleaning or actual repair work usually gets quoted and billed separately from the base visit. Homeowners who ask for a real tune-up breakdown upfront rarely get surprised by a bill that doesn’t match what was promised.
When Should You Call an HVAC Technician Immediately?
Some symptoms don’t wait for your next scheduled visit. A rotten egg smell near a gas furnace means evacuate the house and call your gas utility from outside, not from your kitchen. The same goes for a carbon monoxide detector alarm: get everyone outside first, then call for help. Don’t try to troubleshoot a CO alarm from inside the house.
Other signs move slower but still deserve a same-week call rather than a shrug:
- A burning smell from the air handler or furnace closet, distinct from the brief dusty smell on first fall startup.
- A breaker that trips repeatedly when the system starts, which often points to high amp draw from a failing motor or capacitor.
- Loud vibration or a grinding sound that wasn’t there a month ago.
- Ice forming on the refrigerant lines or a system that keeps losing cooling capacity over consecutive weeks.
On that last point: if your system is low on refrigerant, adding more without diagnosing why is rarely the right call. Refrigerant systems are sealed. Low charge almost always means a leak, and topping it off without finding the leak just means you’re paying for the same refrigerant twice within a year.
Pro Tip: Before your technician arrives, snap a photo of anything unusual, ice buildup, a stain on the ceiling below the air handler, a breaker panel showing which breaker tripped. It helps them diagnose faster and gives you a dated record if the same problem shows up again.
Hiring an HVAC Contractor: What to Verify and What to Expect
Before anyone touches your system, confirm three credentials: a valid state contractor license, EPA Section 608 certification for handling refrigerant, and active liability insurance. Any legitimate HVAC company in St. Louis County or Jefferson County will provide these without hesitation.
- Ask what measurements they’ll take and whether you’ll receive a written report afterward.
- Ask whether photos of any concerning components are included in that report.
- Ask for a written estimate before any repair work begins, not a verbal number over the phone.
- Get at least one additional quote if a repair estimate feels high relative to the age of your system.
You may have heard of the “$5,000 rule” for deciding whether to repair or replace: multiply your system’s age by the estimated repair cost, and if the result tops $5,000, replacement often makes more financial sense. It’s a useful gut check, not gospel. A 12-year-old furnace with a $500 repair (total: $6,000) might still have plenty of life left if the rest of the system tested clean. A 4-year-old system with the same $500 repair clears the threshold easily and should almost certainly be repaired, not replaced. Treat the rule as one data point among several, including your system’s actual tested performance.
Pricing for tune-ups and common repairs varies by system age, brand, and what’s actually wrong, so a written, itemized estimate matters more than any rule of thumb.
DIY vs Professional HVAC Maintenance: Where to Draw the Line
Save your money and your weekend for tasks that don’t require specialized tools or training. Leave anything involving refrigerant, gas, or exposed electrical components to a licensed technician, both for your safety and because DIY work on sealed refrigerant systems can void a manufacturer’s warranty outright.
Safe for homeowners:
- Filter checks and replacement.
- Clearing debris around outdoor units.
- Thermostat programming and battery swaps.
- Visual inspection of vents, registers, and accessible ductwork.
Leave to a professional:
- Refrigerant charge checks and any refrigerant handling.
- Combustion analysis and heat exchanger inspection.
- Live electrical testing and capacitor replacement.
- Static pressure and airflow diagnostics.
A technician’s measurements can also save you money by ruling out expensive fixes. A system that seems to be losing cooling might just have a dirty filter restricting airflow, something a $15 part fixes instead of a $600 repair.
Ricotta Heating & Air: What Our Tune-Up Actually Delivers
A company with decades of experience serving homeowners in the St. Louis area understands that homeowners don’t want a sales pitch disguised as a maintenance visit. Our maintenance plans include documented inspections and actual measurements, temperature split, electrical readings, condensate flow, not a checklist marked “fine” across the board with no numbers behind it.
We’ll show you where your filter housing is and walk you through replacing it yourself if you’ve never done it. Our technicians give honest diagnostics and straightforward recommendations, without pushing a replacement your system doesn’t need yet. That approach is reflected in more than 190 five-star Google reviews from homeowners across the region.
How to Spot Early HVAC Problems Between Tune-Ups
Between scheduled visits, your ears and your energy bill are your best diagnostic tools. A system that used to run quietly and now clicks, rattles, or squeals on startup is telling you something changed, often a loose panel, a failing blower bearing, or a belt that’s slipping.
Airflow problems show up as weak air from vents that used to blow strong, or as one room that’s always warmer or colder than the rest of the house. That imbalance sometimes traces back to a closed damper, a crushed duct run, or simply a filter so clogged it’s choking the whole system, similar to breathing through a thick pillow instead of open air.
Temperature inconsistency room to room, especially if it’s new, is worth logging with dates and which rooms are affected. That pattern helps a technician find the problem faster instead of starting from zero. A system that’s short cycling, turning on and off in rapid bursts rather than running a full cycle, wastes energy and wears components faster, and it often points to an oversized system, a refrigerant issue, or a thermostat placement problem.
Watch your energy bills too. A gradual creep upward with no change in your habits or the weather usually means something in the system is working harder than it should, whether that’s a dirty coil, low refrigerant, or a duct leak you can’t see. Catching that trend in month two beats discovering it in month eight.
Thermostat Calibration and Settings: What to Check
Your thermostat is the control panel for everything else on this list, and a miscalibrated one undermines all your other maintenance work. Start by checking it against a separate room thermometer placed a few feet away. If the two readings differ by more than a degree or two consistently, your thermostat may need recalibration or replacement.
Review these settings during your quarterly check:
- Confirm the fan setting matches your preference, “auto” for efficiency, “on” if you want constant circulation for air quality.
- Check that scheduled setback temperatures still match your household’s actual routine, not a schedule programmed three years ago.
- Verify heating and cooling mode switch cleanly without a long delay or a temperature swing before the system responds.
- For smart thermostats, confirm Wi-Fi connectivity and that firmware updates haven’t reset your schedule.
Placement matters more than most homeowners realize. A thermostat near a sunny window, a kitchen, or a supply vent reads inaccurate temperatures and causes your system to short cycle or run longer than necessary. If yours sits in one of those spots, relocating it is a bigger job, but it’s worth mentioning to your technician at your next tune-up. A thermostat replacement or upgrade is also a reasonable time to fix a placement problem you’ve been living with for years.
Cleaning Vents and Registers: A Simple but Often Skipped Task
Dust buildup on vents and registers looks cosmetic, but it restricts airflow and pulls that same dust back into your system every time the blower runs. It’s one of the easiest maintenance tasks to do yourself and one of the most commonly ignored.
Vacuum supply and return registers monthly using a brush attachment, and pull the register cover off every few months to clean inside the boot where dust collects out of sight. If a room consistently runs warmer or cooler than the rest of the house, check that its register isn’t partially closed or blocked by furniture, rugs, or curtains.
Return air grilles deserve extra attention since they pull air, and everything floating in it, directly into your system. A return grille covered in a visible layer of dust is choking your system’s air supply the same way a clogged filter does. If you notice heavier dust buildup around registers than seems normal, or a musty smell when the system runs, that’s often a sign your ducts themselves need a professional inspection rather than another wipe-down. Sealing gaps in accessible ductwork also matters here: ENERGY STAR estimates that typical ducts leak 20 to 30% of the air moving through them, and sealing accessible joints with mastic or metal-backed tape can improve overall efficiency by 20% or more.
Maintaining Humidifiers and Dehumidifiers Connected to Your HVAC System
If your system includes a whole-home humidifier or dehumidifier, it needs its own place on your checklist, separate from the furnace or air handler itself. These components run on water, which means they’re prone to mineral buildup and mold in ways the rest of your system isn’t.
For whole-home humidifiers, check the water panel or evaporator pad each fall before heating season starts, since mineral deposits from hard water build up over a single season and reduce efficiency. Replace the pad annually, or more often if you notice white, chalky residue. Confirm the humidistat is set appropriately for winter, usually between 30 and 40% relative humidity, to prevent both dry air and window condensation.
For a dehumidifier tied into your ductwork, check the drain line for the same algae buildup that affects your main condensate line, and clean or replace the air filter on the unit itself on a similar schedule to your main system filter. A dehumidifier working harder than it should, running constantly without bringing humidity down, often signals a coil that needs cleaning or a unit that’s undersized for the space it’s serving.
Both components benefit from being included in your indoor air quality conversation with your technician during seasonal visits, since humidity control affects comfort, mold risk, and even how efficiently your main system runs.
Seasonal Maintenance Differences by System Type
A traditional split system, separate outdoor condenser and indoor furnace or air handler, follows the seasonal rhythm described throughout this guide fairly directly: spring focuses on the condenser and cooling components, fall focuses on the furnace and combustion safety.
Heat pumps complicate that rhythm because they work both directions. Since a heat pump runs constantly through both summer and winter, it needs the outdoor unit clearance and coil cleaning treatment year round, not just once before summer. Fall maintenance should always include that reversing valve test, since it’s the one heat pump specific component that has no equivalent in a straight AC or furnace system. If you’re running a heat pump, plan on checking outdoor coil cleanliness at both seasonal visits instead of just one.
Furnace-only systems paired with a separate central AC follow the two-visit rhythm cleanly, but don’t neglect the AC side just because it’s not actively cooling in October. Debris and leaves collecting around an idle condenser over winter can cause airflow problems the following spring if it’s never cleared. Ductless mini-split systems need filter cleaning more frequently than ducted systems since their filters are smaller and more exposed to room dust, and each indoor head needs its own inspection during both seasonal rounds.
Keep It Simple, Measure Everything, and Question Vague Answers
Preventive maintenance beats reactive repair for a straightforward reason: catching a worn capacitor in spring costs far less than the emergency call when it fails outright during a July heat wave. The homeowners who avoid the worst surprises aren’t the ones with the fanciest systems. They’re the ones who keep a simple log, dates, filter changes, whatever measurements a technician handed them, and glance at it before the next season starts.
If a technician tells you your system is “running fine” with no numbers to back it up, ask for the readings. A legitimate tune-up produces a temperature split, a pressure reading, an amp draw, something you can write down and compare next year. Vague reassurance isn’t diagnostics. It’s a guess with good bedside manner.
— Alan Ricotta
Book Your Seasonal Tune-Up With Ricotta Heating & Air
Ricotta Heating & Air is the local alternative to the upsell-heavy service call, honest measurements and clear recommendations, delivered by a family-owned company that’s worked on St. Louis County and Jefferson County homes for 50 years.

Our maintenance plans cover the spring cooling check and fall heating check outlined throughout this guide, with documented measurements at every visit instead of a rushed once-over. Compare plan tiers based on how many systems you’re maintaining and whether you want priority scheduling ahead of the first heat wave or cold snap. At your first visit, expect a technician to walk the system with you, explain what they’re checking, and leave you with a written summary, not just a verbal “looks good.”
If your system needs more than routine care right now, whether that’s AC repair, a furnace tune-up, or a heat pump that’s not switching modes correctly, reach out and we’ll get a technician scheduled. Booking ahead of peak season means better scheduling flexibility and one less thing to worry about when the temperature swings.
Where to Find Official HVAC Maintenance Checklists
- ENERGY STAR’s Maintenance Checklist covers seasonal scheduling and core technician tasks.
- PNNL’s sample unitary HVAC checklist organizes tasks by frequency for homes or facilities managing multiple systems.
Print a copy of either one and hand it to your technician at your next visit.
Sources
- Maintenance Checklist | ENERGY STAR
- Unitary HVAC equipment maintenance checklist | PNNL
- Preventative maintenance for commercial HVAC equipment | Better Buildings
FAQ
What Maintenance Does an HVAC System Actually Require?
At minimum, monthly filter checks with replacement at least every three months, clear space around outdoor units, and two professional tune-ups a year, one for cooling in spring and one for heating in fall.
What Should Be on an HVAC Servicing Checklist?
A complete visit includes tightened electrical connections with voltage and amperage readings, refrigerant pressure and temperature split measurements, blower and capacitor inspection, condensate drain checks, and, on gas systems, combustion analysis and a heat exchanger inspection.
What Is the $5,000 Rule for HVAC?
Multiply your system’s age in years by the estimated repair cost, and if that number exceeds $5,000, replacement is often the more cost-effective choice, though it’s a general guideline rather than a strict formula and should be weighed alongside your system’s actual tested condition.
What Counts as Routine HVAC Maintenance?
Routine maintenance means the homeowner-side tasks, filter changes, outdoor unit clearance, thermostat checks, plus the two annual professional visits that measure performance and catch small issues before they become breakdowns.
How Often Should I Replace My HVAC Filter?
Check it monthly and replace it at least every three months, though homes with pets or high dust levels often need monthly replacement year round, according to ENERGY STAR.