
What a Real HVAC Tune-Up Checklist Should Cover
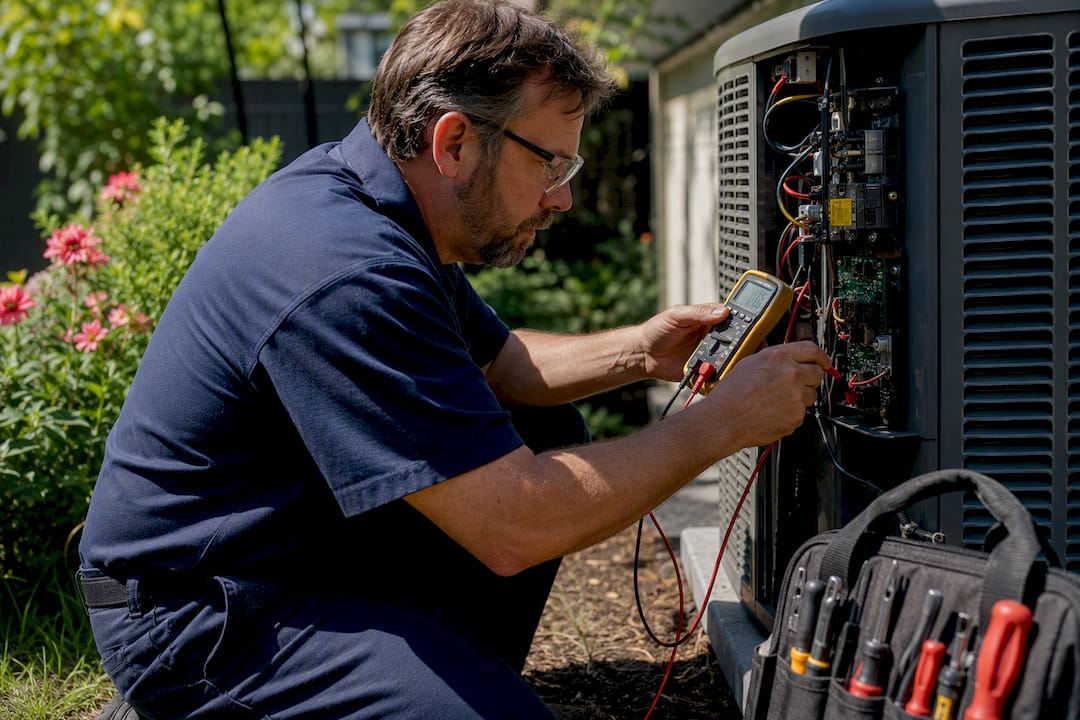
A legitimate HVAC tune-up is a measurement-first inspection: a technician tests components against manufacturer specs and documents what they find, not a quick once-over. That documentation is what tells you whether your system is heading for trouble before it strands you in a heat wave or a cold snap.
If you only check six things this season, make it these:
- Filter condition and fit
- Thermostat response and accuracy
- Condensate drain flow
- Condenser coil cleanliness
- Capacitor and contactor health
- Blower amp draw against nameplate
Filters and outdoor debris are safe DIY territory. Anything involving refrigerant, high voltage, or gas combustion belongs to an EPA-certified technician.
Key Takeaways
A proper HVAC tune-up documents measured readings against manufacturer specs, and that documentation, not a technician’s verbal assurance, is what actually protects your system and your wallet.
| Point | Details |
|---|---|
| Measurement over guessing | A real tune-up records capacitor readings, amp draw, and temperature split, not just a visual glance. |
| Seasonal timing matters | Schedule cooling checks in spring and heating checks in fall, ahead of peak demand season. |
| Know the DIY line | Filters, thermostat checks, and debris removal are safe; refrigerant and combustion work require certified technicians. |
| Duration signals quality | A thorough visit runs 45 to 90 minutes per system; a 15-minute visit likely skipped key checks. |
| Ricotta documents every visit | Ricotta Heating & Air provides photos and recorded measurements with every maintenance visit in St. Louis and Jefferson County. |
Table of Contents
- Your HVAC Tune-Up Checklist: Safe Pre-Visit Tasks
- Spring AC Tune-Up Checklist: What a Technician Should Measure
- Fall Heating Tune-Up Checklist: Combustion and Safety Checks
- Homeowner vs. Professional: Where the Line Actually Sits
- How Long a Tune-Up Takes and What It Should Cost
- Common Red Flags a Tune-Up Uncovers
- Thermostat Calibration and Control Checks
- Checking and Lubricating Moving Parts
- Inspecting Ductwork for Leaks and Insulation
- Verifying System Startup and Shutdown Performance
- Testing Controls for Proper Cycling and Efficiency
- Sources
Your HVAC Tune-Up Checklist: Safe Pre-Visit Tasks
Before a technician ever shows up, you can knock out several checks yourself in under 20 minutes. Doing this first also helps you spot obvious problems and gives the tech a head start.
- Shut off power at the thermostat, then pull the filter and hold it to a light. Replace it if you can’t see light through it.
- Walk the outdoor unit and clear leaves, grass clippings, and mulch from within two feet of the cabinet.
- Check that supply and return registers throughout the house are open and unblocked by furniture or rugs.
- Bump the thermostat five degrees in the opposite direction of the current season and confirm the system responds within a few minutes.
- Look at the condensate line near the indoor unit for visible drips or a musty smell, both signs of a clog forming.
Do this monthly for the filter, and schedule a full seasonal tune-up twice a year regardless of how the system seems to be running.
Pro Tip: If you smell gas, hear grinding or squealing from the outdoor unit, or see scorch marks near the electrical panel, stop and call a technician immediately. Those are not DIY situations.
Spring AC Tune-Up Checklist: What a Technician Should Measure
A spring visit is where sloppy shortcuts show up fastest, because cooling season punishes a poorly maintained system within the first hot week. A thorough visit typically runs 45 to 90 minutes and covers more than 20 distinct points, not a five-minute glance at the outdoor unit.
Outdoor unit work should include:
- Cleaning the condenser coil of dirt, pollen, and grass buildup
- Testing the capacitor’s microfarad rating against its spec sticker
- Checking the contactor for pitting or burn marks
- Confirming the fan motor spins freely
- Clearing debris and vegetation from around the cabinet
Refrigerant lines get a visual inspection, not a top-off by default. A technician should check the suction line insulation for gaps or wear (missing insulation alone can cost you 5 to 10 percent in cooling efficiency) and look for oil stains that suggest a leak. Refrigerant handling itself is restricted by federal law to certified technicians, so if a tech offers to “add refrigerant” without checking your certification or explaining why levels are low, ask more questions.
Indoors, expect:
- Evaporator coil inspection and cleaning if accessible
- Blower motor amp draw measured against the nameplate
- Airflow check and filter replacement
- Condensate line flush plus a check of the drain pan and float switch
A tune-up worth paying for ends with documentation: a photo of the cleaned coil, a meter reading of the capacitor next to its spec sticker, and the measured temperature split between supply and return air. If your invoice doesn’t have any of that, you didn’t get a real inspection.
Fall Heating Tune-Up Checklist: Combustion and Safety Checks
Fall visits carry more life-safety weight than spring ones, because a failing heat exchanger or bad combustion setup can leak carbon monoxide into your living space. This is the one checklist item where corners genuinely cannot be cut.
A proper fall visit typically runs 15 to 20 distinct checkpoints, and the heart of it is combustion safety:
- Visual inspection of the heat exchanger for cracks or corrosion, since a cracked exchanger is a direct carbon monoxide risk
- Combustion analysis measuring flue gas composition
- Burner and ignition system inspection, cleaning if needed
- Gas pressure check against manufacturer specs
- Draft and venting integrity check to confirm exhaust is leaving the home properly
- Carbon monoxide reading taken near the unit and at supply registers
Beyond combustion, the tech should inspect the blower assembly, replace or check the filter, and for high-efficiency condensing furnaces, flush the secondary condensate line since these units produce far more condensation than older models. Ask for the written combustion analysis numbers, not just a verbal “you’re good.” A number on paper is the difference between a documented pass and a technician’s guess.
Homeowner vs. Professional: Where the Line Actually Sits
Knowing what you’re allowed to touch matters as much as knowing what to check. Some tasks are simple safety and confidence. Others carry legal restrictions or real injury risk.
Safe for you:
- Swapping filters
- Basic thermostat function tests
- Clearing debris from around the outdoor unit
- Visual inspections for obvious damage or leaks
Leave to a certified technician:
- Refrigerant handling, which federal law restricts to EPA Section 608 certified technicians
- High-voltage electrical testing on capacitors and contactors
- Combustion analysis and gas pressure adjustments
- In-depth heat exchanger inspection
Pro Tip: Ask to see the technician’s EPA 608 card and request the recorded measurements from your visit, not just a verbal summary. A tech with nothing to hide will hand both over without hesitation.
How Long a Tune-Up Takes and What It Should Cost
A real tune-up takes time, and that time is where the value lives. Industry norms put a thorough per-system visit at 45 to 90 minutes. If a technician is in and out in 15 minutes, they didn’t clean a coil, test a capacitor, or measure amp draw. They looked at your unit and left.
Pricing typically lands in the range covered in our breakdown of AC tune-up costs, with common add-ons for a failing capacitor, a worn contactor, or a cracked igniter, priced separately. Many companies also build a standard 1-inch filter into the base price and charge extra for high-MERV or specialty filters, which is a reasonable practice as long as it’s disclosed upfront.
What justifies the price tag is what you walk away with: photos of the coil before and after cleaning, a written capacitor reading, and a measured temperature split. Without that paperwork, you’re paying for a guess.
Common Red Flags a Tune-Up Uncovers
Certain findings show up again and again, and knowing the urgency helps you decide what to fix now versus what to schedule.
- Capacitor reading below spec: Moderate urgency. It won’t strand you today, but it will soon, and it’s an inexpensive fix.
- Clogged condensate drain: High urgency, especially over a finished basement, since a missing float switch turns a clog into water damage.
- Blower amp spike above nameplate: Moderate to high urgency. A sustained high amp draw often predicts motor failure within about a year.
- Refrigerant leak: High urgency, requires a certified technician to locate and repair.
- Cracked heat exchanger: Immediate shutdown. This is a carbon monoxide hazard, not a wait-and-see item.
Publisher Proof: How Ricotta Documents Every Tune-Up
Ricotta Heating & Air brings 50 years of local HVAC experience in St. Louis and Jefferson County, backed by 150+ five-star Google reviews… Every maintenance visit includes documented readings and photos, not verbal assurances…
Thermostat Calibration and Control Checks
A thermostat that reads five degrees off can cost you real comfort and real money, and most homeowners never catch it because the display just looks like a number. Calibration checks compare what the thermostat reports against an independent reading taken near the return air grille, usually with a separate calibrated thermometer held in the same space for several minutes.
A technician checking your thermostat should verify a few things beyond the raw temperature reading. First, response time: does the system kick on within a reasonable window of a setpoint change, or does it lag? Second, cycle behavior: does the thermostat call for heat or cooling in short bursts, a pattern known as short-cycling, which points to a miscalibrated anticipator or a control wiring issue rather than the thermostat itself. Third, for smart or programmable models, the technician should confirm the schedule and setpoints actually match what you intended, since a lot of “my system runs weird” complaints trace back to a schedule nobody meant to set.
If you’re due for a hardware check, not just calibration, our thermostat repair and replacement guide covers when a recalibration is enough and when the thermostat itself needs to go. Older mechanical thermostats drift out of calibration over years and are rarely worth adjusting twice. A smart thermostat that’s reporting inaccurate temperatures, on the other hand, usually points to a sensor placement problem rather than a defective unit.
Checking and Lubricating Moving Parts
Every HVAC system has parts that physically spin or slide, and friction is the enemy of all of them. The blower motor bearings, the outdoor fan motor, and on older systems, belt-driven blower assemblies all need attention during a seasonal visit.
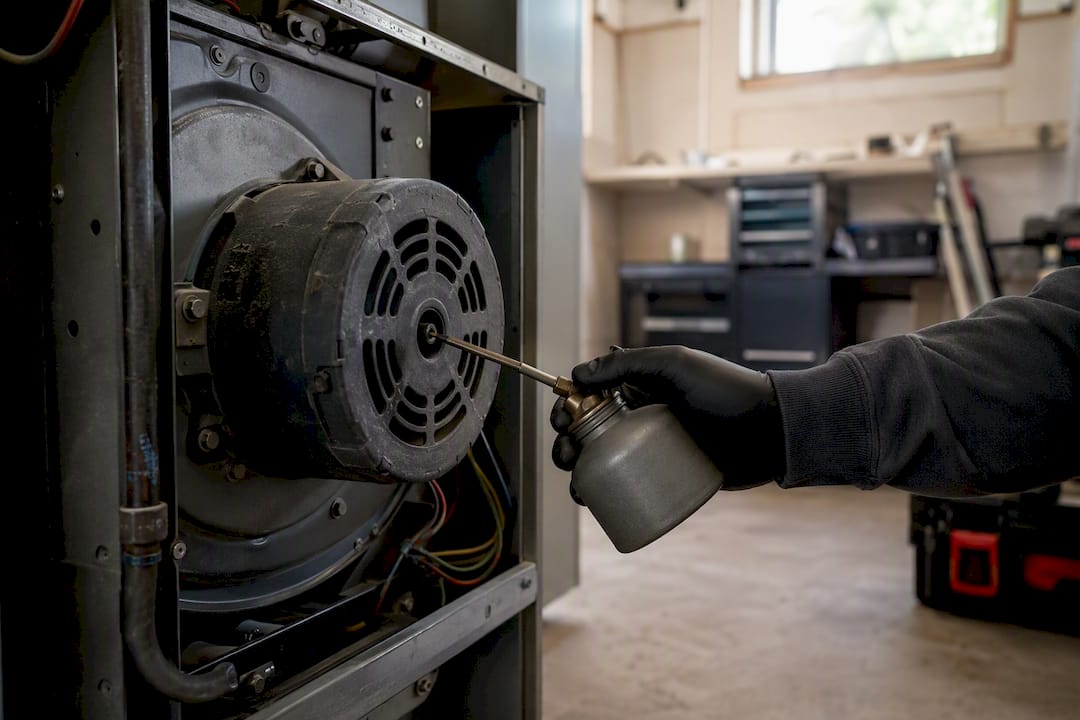
Energy Star specifically lists lubricating moving parts as a standard maintenance task, alongside tightening electrical connections and cleaning coils. A technician should apply lubricant to motor bearings that have oil ports (many newer sealed bearings don’t need it) and check belt tension and wear on older belt-driven blowers. A belt that’s cracked, glazed, or too loose wastes energy and eventually snaps at the worst possible time, usually the first cold night of the year.
This is also where a technician listens as much as they look. A grinding or squealing sound from the outdoor fan motor almost always means a bearing is failing, and it’s far cheaper to replace a $150 to $300 motor now than to let it seize and potentially damage the compressor it’s meant to cool. Tight electrical connections matter here too. A loose wire on a motor circuit creates resistance, resistance creates heat, and heat is what eventually cooks a connection or trips a breaker at the wrong moment.
Inspecting Ductwork for Leaks and Insulation
Your ductwork is the delivery system for everything your HVAC equipment produces, and leaky or poorly insulated ducts quietly waste a chunk of that output before it ever reaches a room. A technician should visually inspect accessible ductwork, typically in the attic, basement, or crawl space, for disconnected joints, crushed sections, and visible gaps at the plenum connections.
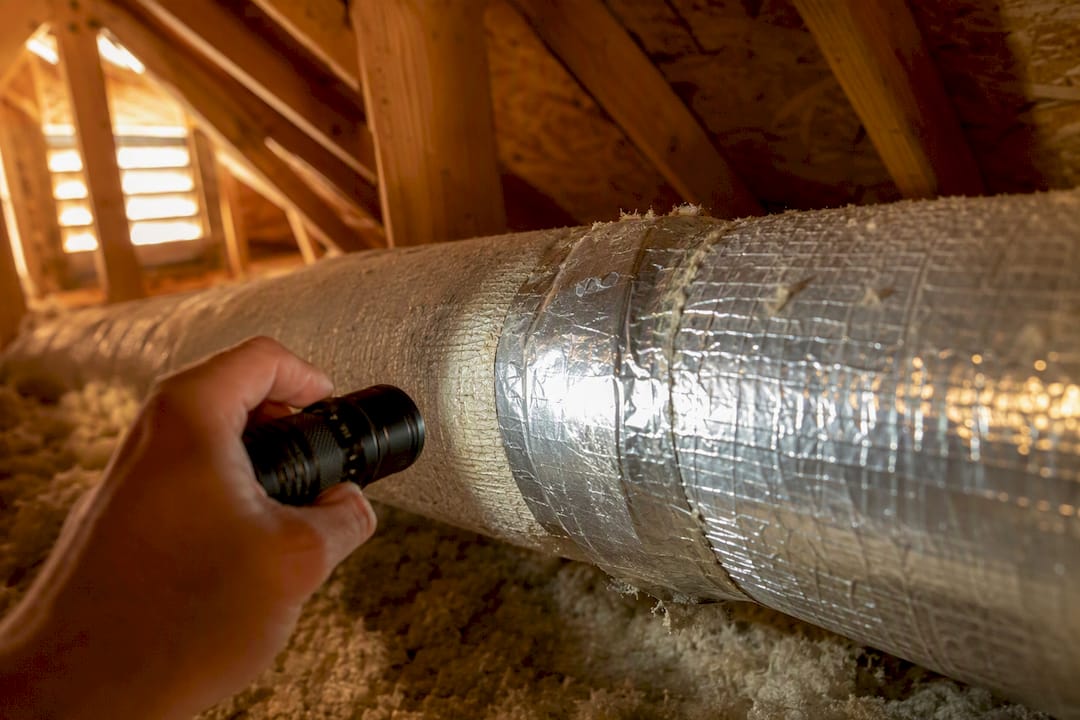
Leaks show up as a hissing sound near joints, visible gaps you can slide a hand near, or simply a room that never seems to get as cool or warm as the rest of the house despite good airflow at the register. Insulation matters just as much as the seal. Ducts running through an unconditioned attic or crawl space need adequate wrap insulation, because bare metal ductwork loses conditioned air to the surrounding space the same way an uninsulated water heater loses heat.
Sealing minor leaks with mastic sealant or foil tape (never standard cloth duct tape, despite the name) is a relatively inexpensive fix a technician can often handle during the same visit. Larger disconnects or crushed sections usually mean a follow-up repair. If your ductwork inspection turns up widespread problems, it’s worth asking your technician whether your system’s overall capacity still matches your home, since undersized or oversized equipment often gets blamed on ducts when the real issue started at installation.
Verifying System Startup and Shutdown Performance
A system that runs fine once it’s going but struggles to start or won’t shut off cleanly is telling you something specific. Startup and shutdown checks are where a technician watches the full cycle from a cold start rather than just checking steady-state readings.
On startup, the technician should watch for hard starts, meaning the compressor struggles or hesitates before running smoothly. That often points to a weak capacitor or a compressor nearing the end of its life. They should also confirm the system reaches its target temperature split within a reasonable window rather than running indefinitely without closing the gap.
On shutdown, the check is different but just as telling. The system should power down without unusual noise, without the blower continuing to run far longer than the fan delay setting calls for, and without the outdoor fan or compressor “hunting,” or repeatedly trying to restart right after shutting off. That hunting behavior often signals a failing contactor or a control board issue. A technician who skips this step and only checks the system mid-cycle is missing exactly the moments when developing problems tend to reveal themselves first.
Testing Controls for Proper Cycling and Efficiency
Cycling behavior is one of the clearest windows into whether your system is sized correctly and running efficiently, and it’s a check that takes real time to do right, which is part of why rushed tune-ups skip it. A technician should time how long your system runs per cycle and how often it cycles over a representative period, not just glance at it once.
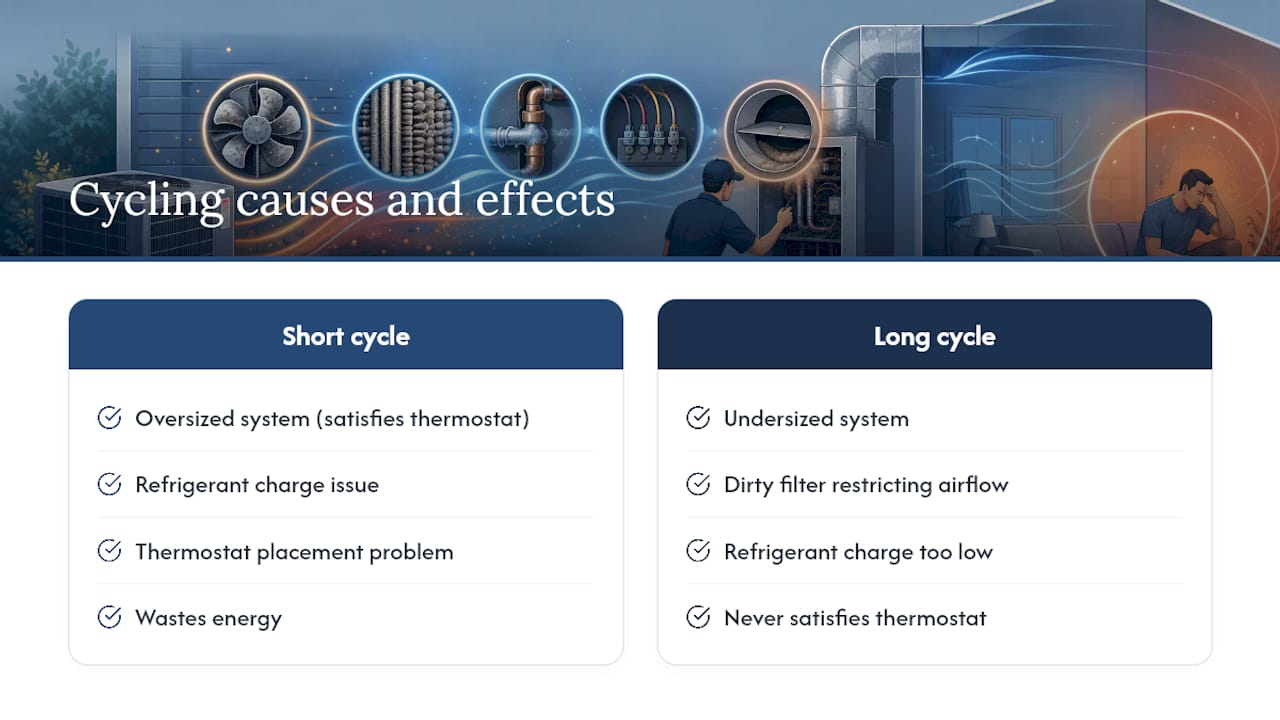
Short-cycling, where the system turns on and off frequently in short bursts, wastes energy and accelerates wear on the compressor and blower motor. It usually points to one of a few causes: an oversized system that satisfies the thermostat too quickly, a refrigerant charge issue, or a thermostat placement problem where the sensor doesn’t reflect the room’s actual temperature. Long-cycling or a system that never seems to satisfy the thermostat suggests the opposite problem, often an undersized system, a dirty filter restricting airflow, or a refrigerant charge that’s too low.
Efficiency testing during this check means comparing your system’s actual performance against its rated specifications. That includes the temperature split across the evaporator coil and, where equipment allows, static pressure readings that show whether the ductwork is fighting the blower more than it should. A system cycling properly and hitting its rated temperature split is a system that’s earning its utility bill. One that isn’t is telling you a diagnosis is overdue, whether that’s a repair, a duct sealing job, or in older systems, a conversation about replacement.
A Personal Note From Alan
If you take one thing from this checklist, make it this: insist on numbers, not adjectives. A technician who says your system “looks fine” hasn’t done the job. One who shows you a capacitor reading, a temperature split, and a coil photo has.
Skip the Guesswork With a Documented Ricotta Tune-Up
Ricotta Heating & Air is the local alternative to the rushed, 20-minute tune-up that leaves you with nothing but a verbal “you’re all set.” Every visit comes with documented measurements, photos of the work performed, and honest diagnostics with no upsell pressure, backed by 50 years serving St. Louis and Jefferson County homeowners and 150+ five-star Google reviews.

Whether you need a standalone spring or fall visit or want the peace of mind of priority scheduling twice a year, our HVAC maintenance plans cover both cooling and heating systems under one agreement. If your last tune-up flagged a repair you’ve been putting off, our AC and furnace repair team can take care of it on the same visit. Schedule your next seasonal tune-up and get the written report your system deserves.
Sources
This checklist draws on Energy Star’s seasonal maintenance guidance for scheduling and standard tasks, EPA Section 608 certification rules for refrigerant handling, DOE guidance on diagnostic maintenance, and FieldServiceCompare’s technician-level checklist for point counts and documentation standards. For a second homeowner-facing reference, see this HVAC maintenance checklist.
- Maintenance Checklist | ENERGY STAR
- Section 608 technician certification requirements | EPA
- Home maintenance and safety | DOE
- HVAC Tune-Up Checklist 2026 — FieldServiceCompare