
5 Quick AC Checks St. Louis Homeowners Can Do in 30–60 Minutes
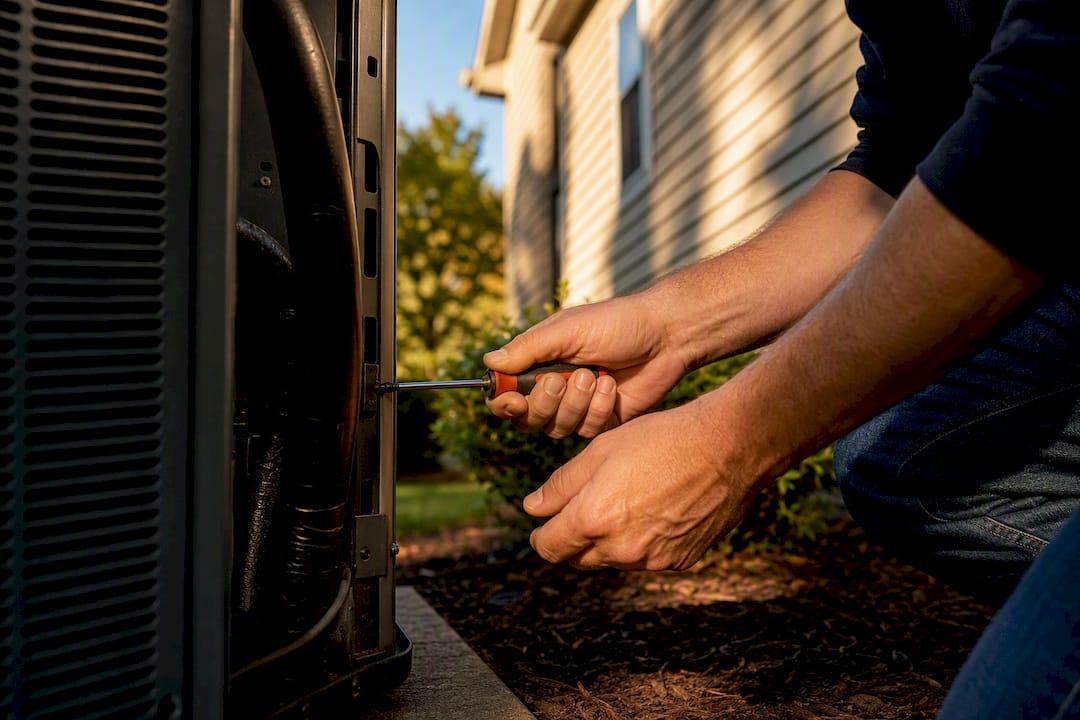
Do five things before the first 90-degree day hits St. Louis: swap the filter, clear the condenser, check your vents, flush the drain, and run a cooling test on your thermostat. Budget 30 to 60 minutes. If it’s been over a year since a professional tune-up, book one now, before the summer rush hits. That combination catches most problems before they turn into a breakdown, and it keeps your cooling bills from creeping up when you least expect it.
TL;DR:
- Regularly inspecting and replacing filters, especially at least every 90 days for pleated types, prevents system strain during peak cooling periods.
- Clearing debris from the outdoor condenser and ensuring at least 12 inches of clearance improves airflow and reduces energy use.
- Testing the thermostat and running a cooling cycle should produce cold air within 5 to 10 minutes, indicating proper system performance.
- Leaking or cracked refrigerant line insulation should be replaced promptly to prevent humidity problems and efficiency loss.
- Booking a professional tune-up before summer, including refrigerant and electrical checks, can save money and avoid emergency repairs later.
Table of Contents
- How Do I Prepare My AC for Summer?
- What’s the Right Filter Schedule, and How Do I Check My Vents?
- How Do I Clean My Outdoor AC Unit Safely?
- How Do I Test My AC Before the First Hot Day?
- When Should You Call a Professional for AC Service?
- Should You Repair or Replace an Aging AC Unit?
- Why Local St. Louis Experience Matters for AC Prep
- How Do You Lubricate the Moving Parts in an AC System?
- How Do You Seal Leaks in Your Ductwork?
- Why Insulate Exposed Refrigerant Lines?
- A Local Perspective on Getting Ready for Summer
- Book Your Spring AC Tune-Up With Ricotta Heating & Air
- Sources
- FAQ
How Do I Prepare My AC for Summer?
Before the humidity rolls in off the Mississippi, run through this list in order. Each step builds on the last, and skipping ahead can mean missing a clog or blockage that undoes your other work.
- Replace or inspect the air filter. A dirty filter is the number one reason AC units struggle in July, and it’s the easiest fix on this list.
- Clear debris from the outdoor condenser. Leaves, grass clippings, and mulch pile up over winter and choke airflow to the unit.
- Check vents and returns throughout the house. Walk each room and confirm nothing is blocking a supply vent or return grille.
- Flush the condensate drain if you can access it. A clogged drain line is one of the most common causes of water damage near indoor units.
- Test the thermostat and run a cooling cycle. Set it a few degrees below room temperature and confirm cold air reaches the vents within several minutes.
IMPORTANT: Before touching the outdoor condenser, shut off power at the disconnect box mounted on the exterior wall near the unit. It’s a simple pull handle or breaker switch, and skipping this step is how people get hurt or damage a compressor.
Do these five in order and most homeowners can identify a problem before it becomes an emergency call. If everything checks out, you’re ready for the season. If something feels off, the next few sections tell you exactly what to look for.
What’s the Right Filter Schedule, and How Do I Check My Vents?
A clogged filter forces your system to work harder to pull air through, kind of like trying to breathe through a pillow. Rheem’s guidance recommends checking filters monthly no matter what type you have installed.
- Standard 1-inch filters: replace regularly during peak cooling season as needed.
- Pleated filters: replace at least every 90 days, per Department of Energy guidance.
- Homes with pets or allergy sufferers: check more frequently and replace filters sooner if they appear dirty.
- MERV rating: higher numbers trap more particles, but a filter rated above what your system was designed for can restrict airflow and strain the blower motor.
Walk your house and confirm every supply vent and return grille is open and unobstructed. Furniture, rugs, and curtains pushed over a vent are more common than you’d think, especially in finished basements.
Pro Tip: If a room never seems to cool evenly no matter what you do to the vents, that’s often a sign of a duct problem in the attic or crawlspace, not a thermostat issue. That’s worth a professional look before summer, not during it.
How Do I Clean My Outdoor AC Unit Safely?
Your condenser sits outside all winter collecting cottonwood fluff, grass clippings, and whatever the wind blows into the yard. That buildup traps heat the unit needs to release, and a blocked condenser works harder for weaker results.
Start by killing power at the outdoor disconnect. Then work through these steps.
- Clear leaves, mulch, and grass clippings from the top and sides of the unit by hand.
- Rinse the fins and coil with a garden hose on a gentle spray setting, spraying from the inside out if possible.
- Never use a pressure washer. The force can bend the thin aluminum fins and permanently reduce airflow.
- If fins are already bent, a fin comb (sold at most hardware stores) straightens them back into place.
- Maintain at least 12 inches of clearance around the unit, and ideally 24 inches, trimming back bushes or ornamental grasses that crept in over spring.
Rheem recommends cleaning the outdoor coil twice a year, once in spring and again mid summer if your yard sheds a lot of debris. St. Louis homes near mature trees often need the mid-season cleaning more than most.
How Do I Test My AC Before the First Hot Day?
Once the filter is fresh and the condenser is clear, it’s time to actually run the system and see how it performs.
- Locate the condensate drain line, usually a PVC pipe near the indoor air handler. If it has a cleanout cap, flush it with a cup of white vinegar or plain water to clear early-stage algae growth, common in St. Louis’s humid summers.
- Set your thermostat to cooling mode, roughly 5 degrees below the current room temperature.
- Confirm the outdoor unit kicks on within a minute and that cold air reaches the vents within 5 to 10 minutes.
Watch for warning signs while you test: warm air blowing from vents, ice forming on the refrigerant line, loud grinding or buzzing from the outdoor unit, or the system cycling on and off every few minutes instead of running a full cycle. Any of these point to low refrigerant, a failing compressor, or an electrical issue, and they’re not DIY fixes. Call a licensed technician rather than guessing.
When Should You Call a Professional for AC Service?
If your DIY checks turn up nothing but the system still isn’t cooling right, or it’s simply been a while since anyone looked under the hood, it’s time for a professional visit. ENERGY STAR recommends annual pre-season check-ups in spring, before the heat arrives and before every other homeowner in the county is calling for the same appointment.
A proper tune-up covers ground a homeowner can’t reach with a garden hose and a screwdriver:
- Cleaning the evaporator coil, which sits inside the air handler and collects dust and grime you’ll never see
- Checking refrigerant charge and pressure
- Testing electrical connections, capacitors, and safety controls
- Cleaning the blower wheel and housing
- Flushing the condensate drain fully, not just what’s reachable by hand
- Measuring the temperature split between return and supply air to confirm the system is actually cooling at capacity
Editorial cost benchmarks homeowners can expect: a basic diagnostic visit typically runs $80 to $200, standard maintenance visits fall between $80 and $250, small electrical repairs land around $150 to $650, refrigerant leak repairs run $500 to $1,500, and compressor or major component failures can exceed $1,500. These are general ranges, not quotes. Get an actual number in writing before work starts.
Booking in spring, rather than waiting for the first heat wave, means shorter wait times and no emergency surcharge. It also gives a contractor time to order parts if something’s on backorder. When you call around, ask whether the company carries common parts on the truck and whether they offer a maintenance plan that locks in priority scheduling for the next visit.
Should You Repair or Replace an Aging AC Unit?
Not every problem is worth fixing on an old system. A simple rule of thumb: if your unit is 12 years or older and a repair quote comes in above approximately half the cost of full replacement, replacement usually makes more financial sense.
- Add up the repair quote and compare it against a rough replacement estimate from the same contractor.
- Factor in SEER ratings. Older units often run SEER 10 to 13, while new systems are required to meet much higher efficiency minimums, which can meaningfully cut your summer electric bill.
- Check that ducts and attic insulation aren’t the real problem first. A brand-new AC pushing air through leaky ducts still won’t cool the house evenly.
Quick math: if a technician quotes $1,400 to fix a 14-year-old unit and a new system runs $6,000, that repair is well under the 50% threshold and probably worth doing. If that same quote were $3,500, replacement starts looking like the smarter long-term bet.
Why Local St. Louis Experience Matters for AC Prep
A local HVAC company has served St. Louis County and Jefferson County homeowners for decades, backed by numerous five-star Google reviews. We see the same local patterns every spring: algae clogging condensate drains in humid basements, and attic ducts that leak conditioned air into 130-degree attic space. Honest diagnostics, no upselling, just straight answers about what your system actually needs.
How Do You Lubricate the Moving Parts in an AC System?
Older AC units, particularly those with a blower motor that isn’t sealed or “permanently lubricated,” have small oil ports on the motor housing that need a few drops of lightweight, non-detergent oil once a year. Newer motors are usually sealed and don’t need this step at all, so check your owner’s manual or the motor label before assuming yours needs oiling.
The fan motor on the outdoor condenser sometimes has similar ports, though most modern condenser fan motors are also sealed units. If yours has visible oil ports, a few drops of the correct oil type keeps the bearings from drying out and squealing, which is usually the first sign of a motor on its way to failure.
Beyond the motors, a technician doing a full tune-up also checks the blower wheel bearings and any belt-driven components for wear, since a system with dry, grinding bearings has to work harder and pulls more power to do the same job.
If you’re not sure whether your equipment has oil ports, or you’re uncomfortable opening the housing, this is a task worth leaving to a professional during your spring visit. Adding the wrong oil, or too much, can attract dust and cause more harm than skipping it altogether. It’s a small task, but it’s one that gets skipped more than almost anything else on this list, mostly because homeowners don’t know it exists.
How Do You Seal Leaks in Your Ductwork?
Leaky ducts are one of the biggest hidden reasons your AC runs constantly but never quite cools the house. The Department of Energy notes that sealing ducts is one of the more effective ways to cut cooling losses, and university extension research points to losses around 30% of conditioned air through leaking or poorly insulated ductwork in some homes.
For accessible ducts in a basement, attic, or crawlspace, look for visible gaps at joints and connections, especially where flexible duct meets metal fittings. Metal-backed foil tape, not standard cloth duct tape despite the name, is the right material for small leaks you can reach. Cloth duct tape dries out and peels within a couple of years, especially in a hot attic.
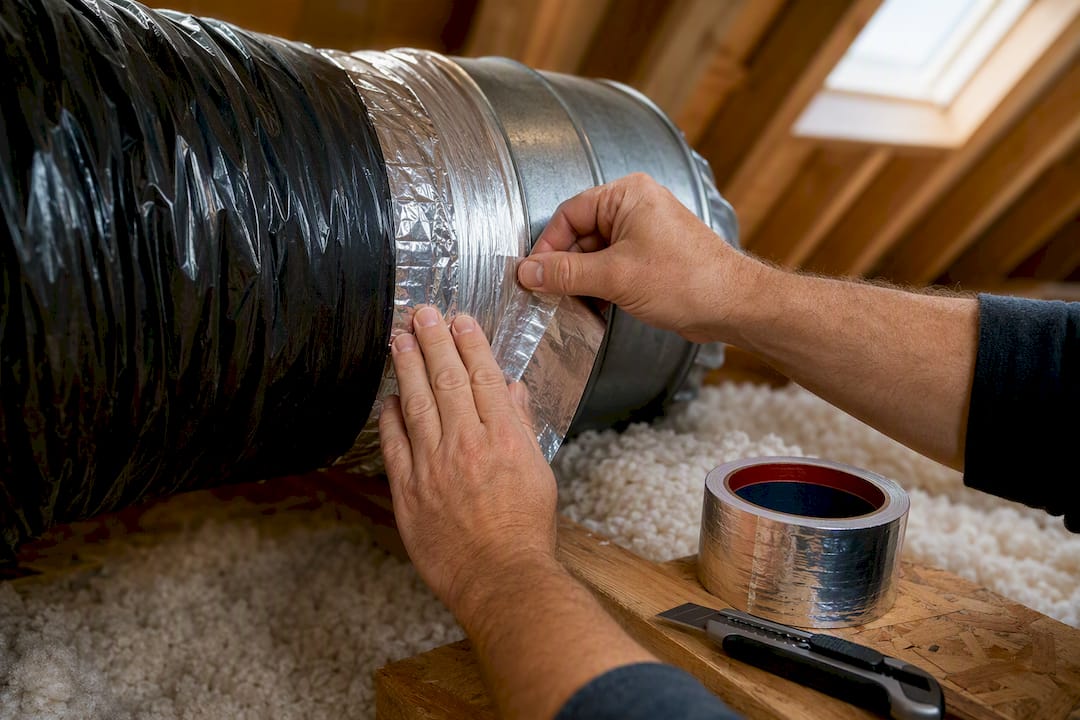
For anything beyond small, obviously visible gaps, or ductwork buried in insulation or hard to reach safely, this becomes a job for a professional with a duct blaster test to measure actual leakage. Sealing ducts you can’t fully inspect is guesswork, and guesswork in a 130-degree attic isn’t where you want to be figuring things out. St. Louis homes with older additions or finished attic spaces tend to have the worst duct leakage, since ductwork often got extended without much attention to sealing.
Why Insulate Exposed Refrigerant Lines?
The larger of the two copper lines running from your outdoor condenser to the indoor evaporator coil, called the suction line, should be wrapped in foam pipe insulation along its entire visible length. That insulation keeps the line cold enough to carry refrigerant efficiently and stops condensation from dripping onto surrounding wood or drywall.
Over a St. Louis winter, that foam insulation cracks, splits, or gets chewed through by squirrels more often than homeowners expect. Check the line where it exits the house and runs to the condenser. If you see bare copper, gaps in the foam, or insulation that’s crumbling when you touch it, it needs replacing before summer humidity turns that exposed section into a sweating, dripping problem.
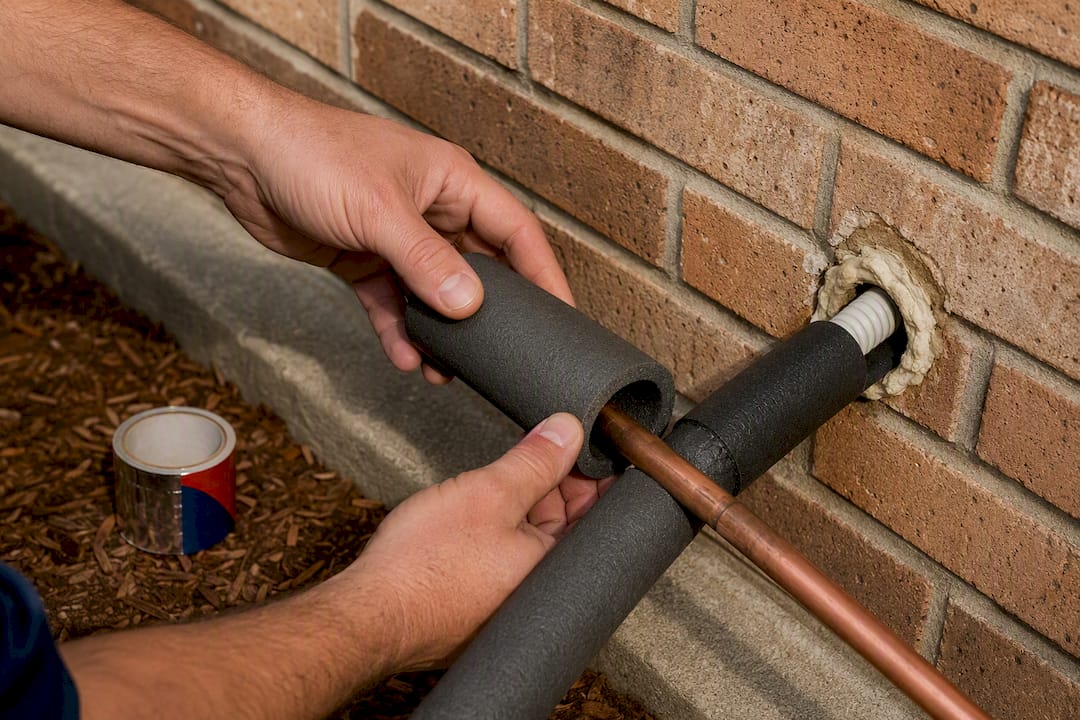
Replacement foam sleeves are inexpensive and slide over the line, sealed at the seams with foil tape or the adhesive strip built into the product. This is one of the few tasks on this list that’s genuinely simple and low risk, as long as you’re not disturbing the line connections themselves. Leave anything involving disconnecting or repairing the line to a licensed technician, since that’s refrigerant-handling territory regulated by federal law.
A Local Perspective on Getting Ready for Summer
Most of what’s on this checklist is safe for any homeowner to tackle in an afternoon, and doing it consistently each spring is the single best habit for avoiding a breakdown in August. Where I’d draw the line is refrigerant, electrical components, and anything inside the cabinet you’d need tools to open. That’s when transparent pricing and a documented service agreement protect you far more than guessing ever will.
— Alan Ricotta
Book Your Spring AC Tune-Up With Ricotta Heating & Air
Our team provides honest diagnostics instead of an upsell pitch, so the recommendation you get matches what your system actually needs, not a sales quota.

Our team handles the parts of this checklist most homeowners shouldn’t tackle alone: refrigerant checks, electrical testing, coil cleaning, and full diagnostic work covered in a proper AC tune-up. We also offer maintenance plans through our service agreements program, which lock in priority scheduling so you’re not waiting behind everyone else once the first heat wave hits. If your thermostat needs an upgrade or replacement while we’re there, we handle thermostat service too. Spring is the season to get on the schedule, before wait times stretch and emergency rates kick in. Reach out today to book your tune-up before the temperature climbs.
Sources
ENERGY STAR’s maintenance checklist covers coil cleaning and filter schedules. The Department of Energy’s efficiency guide explains duct sealing and tune-up benefits. HVACDatabase’s homeowner checklist offers step-by-step tasks and cost benchmarks. For broader home-prep reading, Caledonian Mechanical’s blog covers additional contractor-focused maintenance topics.
- Maintenance Checklist | ENERGY STAR
- Energy
- How to Prepare Your AC for Summer: A Homeowner’s Checklist
- 5 Ways to Prep Your HVAC System for Summer - Rheem Manufacturing Company
FAQ
Is 72 Degrees a Good AC Setting for Summer?
Seventy-two works well for many households, but comfort varies by person and humidity level. Setting the thermostat a few degrees higher when you’re away can reduce strain on the system and lower your bill without sacrificing comfort when you’re home.
What Is the 3-Minute Rule for Air Conditioners?
The 3-minute rule refers to waiting at least three minutes after turning an AC unit off before turning it back on, giving internal pressure time to equalize so the compressor isn’t forced to start under strain. Most modern thermostats and systems have built-in delays that handle this automatically.
How Cool Should My House Be if It’s 100 Degrees Outside?
A well-maintained system should hold an indoor temperature significantly below the outdoor temperature, so a comfortable indoor temperature on a hot St. Louis day is realistic. If your home can’t get close to that gap, it’s worth a diagnostic check rather than assuming the thermostat is wrong.
Is It Okay to Run AC When It’s 60 Degrees Outside?
Running a standard AC unit when outdoor temperatures drop below roughly 60 degrees can cause the refrigerant to not fully vaporize, which risks liquid refrigerant returning to the compressor and causing damage over time. Most manufacturers advise against regular use below that threshold unless the unit is specifically rated for low-ambient operation.
How Much Does an AC Tune-Up Cost?
Standard maintenance visits typically run $80 to $250, depending on your system’s condition and what the visit includes. Ricotta Heating & Air’s current tune-up pricing is available on our cooling services page.