
AC Capacitor Replacement Cost: What Homeowners Should Know
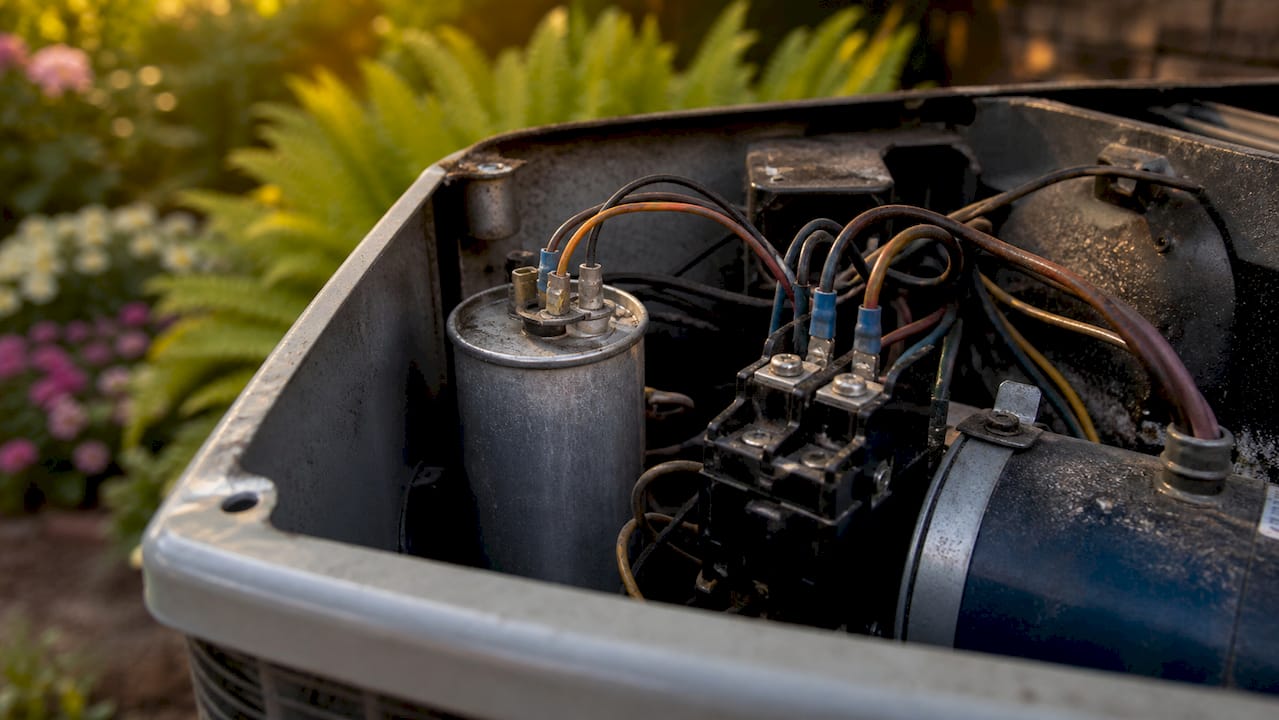
Replacing an AC capacitor typically costs between $80 and $400 installed, with most homeowners landing around $175 for a complete swap that includes the part, a diagnostic fee, and labor. That range covers the vast majority of standard residential jobs during normal business hours. If your system is humming but not cooling, or struggling to start on a hot July afternoon, a failed capacitor is one of the most common culprits, and one of the more affordable fixes in the HVAC world. Call a licensed HVAC technician to diagnose and replace it safely. Stored electrical charge inside a capacitor can cause a serious shock even after the unit is powered off, so this is not a job to rush into without the right training.
Here is what that cost typically breaks down to:
- Capacitor part: $8–$60 depending on type and microfarad (µF) rating
- Diagnostic/service call fee: $90–$150
- Labor: $60–$150 per hour (most jobs take under an hour)
- After-hours or peak-season surcharge: 1.5x–2x the standard labor rate
- Typical total installed range: $90–$480, with the national average closer to $150–$250 during regular business hours
Key Takeaways
Replacing an AC capacitor costs $80–$400 installed for most homeowners, with the national average near $175 for a standard daytime job that includes the part, diagnostic fee, and labor.
| Point | Details |
|---|---|
| Typical installed cost | Most homeowners pay $80–$400, with $175 being the common midpoint for a complete swap. |
| Part vs. labor split | The capacitor itself costs $8–$60; the majority of the invoice covers the service call and labor. |
| DIY risk | Stored charge makes capacitor replacement dangerous without proper discharge tools and electrical training. |
| Early repair saves money | A ~$175 capacitor fix can prevent a $1,500–$3,000 compressor replacement if caught before motor damage occurs. |
| Ricottaheatingandair | Serves St. Louis and Jefferson County with transparent diagnostics, no upsell pressure, and warranted repairs. |
Table of Contents
- What does an AC capacitor actually do?
- Start, run, and dual-run capacitors: which one does your unit use?
- Signs your AC capacitor may be failing
- What causes AC capacitors to fail?
- How much does AC capacitor replacement cost? A full 2026 breakdown
- How does a technician test a capacitor?
- Should you replace an AC capacitor yourself?
- What happens during a professional capacitor replacement?
- How long do AC capacitors last, and how can you extend their life?
- Real-world 2026 cost examples: low, typical, and high
- Why hiring a licensed HVAC technician is worth it
- An honest perspective on capacitor diagnostics
- Ricottaheatingandair is ready to help with your capacitor repair
- Sources
What does an AC capacitor actually do?
Think of a capacitor as a short-term battery for your AC’s motors. It stores a burst of electrical energy and releases it to start the compressor and fan motors, then continues supplying a steady current to keep them running. Without that initial jolt, the motors stall. Without the steady current, they overheat and wear out faster.
When a capacitor weakens or fails, the motors it serves either struggle to start or cannot start at all. That is why a bad capacitor often shows up as a system that hums but blows warm air, or an outdoor unit that simply sits there doing nothing while your thermostat calls for cooling.
Every capacitor has two key ratings printed on its label:
- Microfarad (µF): the capacitance value, which must match the motor’s specification exactly
- Voltage rating: the maximum voltage the capacitor can safely handle (the replacement must meet or exceed this)
You can read both values directly off the cylindrical capacitor inside your outdoor unit’s electrical panel. If a technician is replacing yours, ask them to note both values on your invoice so you can verify the replacement matches.
Start, run, and dual-run capacitors: which one does your unit use?
Most homeowners have never heard these terms until something breaks. Here is the short version:
- Start capacitor: provides a large burst of energy to get a motor spinning, then drops out of the circuit. Used on compressors that need extra torque to start.
- Run capacitor: stays in the circuit the entire time the motor runs, providing continuous support. This is the most common type in residential outdoor units.
- Dual-run capacitor: a single cylindrical component that handles both the compressor and the condenser fan motor simultaneously. It carries two µF ratings on its label, such as 45/5 µF, and is the most common capacitor found in residential central AC systems.
The dual-run design is popular because it consolidates two functions into one part, which simplifies installation. It also means one failed component can knock out both the compressor and the fan at the same time. Installed prices for a dual-run capacitor typically run $150–$400, compared to $130–$300 for a single-run replacement, and $180–$450 when a start capacitor and relay are involved.
Signs your AC capacitor may be failing
Your system usually gives you warning before a capacitor quits entirely. Watch for these:
- Humming from the outdoor unit with no cooling. The motors are trying to start but cannot get enough power.
- Slow or labored startup. The system takes several seconds to kick on, or the fan blade spins sluggishly before reaching full speed.
- Intermittent cooling. The AC works fine for a while, then stops, then restarts on its own. A weakening capacitor can still function under mild conditions but fails under load.
- Frequent tripped breakers. A struggling motor draws more current than normal, which can trip the circuit breaker repeatedly.
- Visible bulge or oil residue on the capacitor. A swollen top or a brown oily stain on the capacitor body is a clear sign of internal failure.
- Longer run times or short cycling. The system runs constantly without reaching the set temperature, or shuts off and restarts frequently.
- No response from the outdoor unit at all. The indoor air handler runs but the outdoor unit stays silent.
IMPORTANT: If you notice a burning smell, see smoke, or the breaker trips repeatedly in a short period, shut the system off at the disconnect and call a technician immediately. Do not reset the breaker and try again.
Pro Tip: Before calling, note whether the outdoor fan is spinning and whether you can hear a hum from the unit. That detail helps a technician narrow down whether the compressor capacitor, the fan capacitor, or both are involved, which saves diagnostic time.
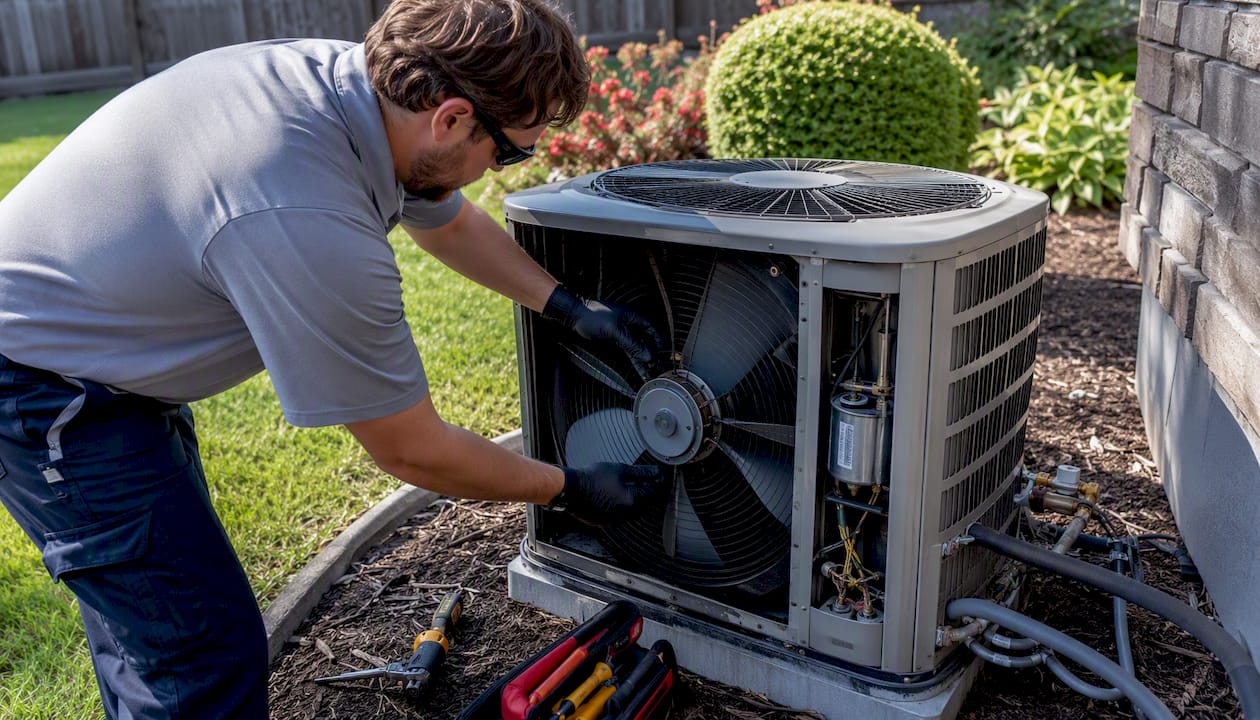
What causes AC capacitors to fail?
Capacitors do not last forever, and several factors accelerate their decline:
- Age and normal wear. Most capacitors have a service life of roughly 10–20 years, though heat and electrical stress shorten that considerably.
- Heat exposure. Capacitors sit inside the outdoor unit, which can reach extreme temperatures in direct sun. Sustained heat degrades the internal dielectric fluid faster than almost anything else.
- Power surges and voltage spikes. A lightning strike nearby or a utility grid fluctuation can push voltage beyond the capacitor’s rated limit and cause immediate failure.
- Vibration. Constant motor vibration loosens internal components over time, especially in units that are not properly secured.
- Repeated hard starts. Every time the compressor starts against high head pressure (common on very hot days), the start capacitor absorbs a significant electrical load. Frequent cycling multiplies that stress.
- Poor airflow around the unit. Debris, overgrown shrubs, or a clogged condenser coil trap heat inside the cabinet, raising the operating temperature of every component inside.
Pro Tip: If you have replaced a capacitor twice in three years on the same unit, the capacitor is not the root problem. Ask your technician to check motor amp draw and supply voltage. A motor pulling above its rated amperage is cooking capacitors from the inside out.
How much does AC capacitor replacement cost? A full 2026 breakdown
According to multiple 2026 cost sources, total installed prices range from about $90 to $480, with the national average sitting between $150 and $250 for a standard daytime appointment. Here is how that invoice typically breaks down line by line.
Part cost by capacitor type
| Capacitor Type | Part Cost (Typical) | Typical Installed Total |
|---|---|---|
| Single-run (low µF) | $8–$30 | $90–$200 |
| Single-run (high µF) | $20–$60 | $130–$300 |
| Dual-run (e.g., 45/5 µF) | $15–$50 | $150–$400 |
| Start capacitor + relay | roughly twenty-five to eighty dollars | from about one hundred eighty to four hundred fifty dollars |
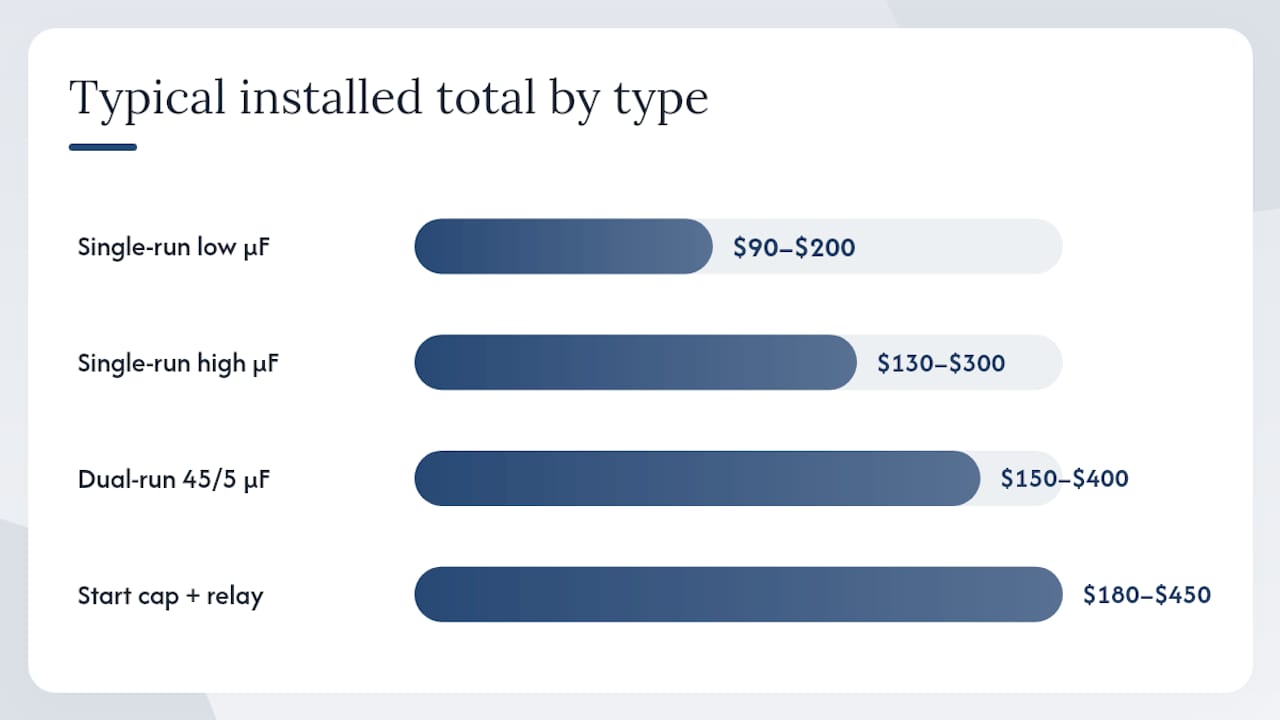
Part costs in the $8–$60 range reflect the reality that the capacitor itself is inexpensive. Most of what you pay covers the technician’s time, expertise, and the service call fee.
Other invoice line items to expect
- Diagnostic/service call fee: $90–$150. This covers the technician’s travel and the time spent identifying the problem. Some companies waive this fee if you approve the repair.
- Labor: $60–$150 per hour. A straightforward capacitor swap takes 30–60 minutes for an experienced tech.
- After-hours and peak-summer surcharges: Expect 1.5x–2x the standard labor rate for evenings, weekends, and holiday calls. A $175 daytime job can become $300+ on a Saturday night in August.
- OEM vs. aftermarket parts: OEM (original equipment manufacturer) capacitors from brands like Carrier or Trane cost more than aftermarket equivalents. Both can be appropriate; ask your technician which they are installing and why.
Carrier’s own guidance puts total replacement costs at roughly $100–$400 and stresses that professional installation is the right call for correct rating and safe handling. That aligns well with what you will see on most residential invoices in St. Louis and Jefferson County.
Pro Tip: Ask for the replaced capacitor’s µF and voltage rating on your invoice. If the new part does not match the nameplate specs on your unit, the motor will wear faster or the system may not start reliably.
How does a technician test a capacitor?
A good technician does not just swap parts and hope for the best. Here is the diagnostic sequence you should expect:
- Visual inspection. The tech opens the outdoor unit’s electrical panel and looks for a swollen top, oil residue, or burn marks on the capacitor or surrounding wiring.
- Capacitance measurement. Using a multimeter with a capacitance function or a dedicated capacitance meter, the tech measures the actual µF value and compares it to the nameplate rating. A capacitor reading more than 6% below its rated value is considered failed by most HVAC standards.
- Voltage check. The tech verifies that the supply voltage at the capacitor terminals matches the system’s rated voltage. Low or high voltage points to a separate electrical issue.
- Motor amp-draw check. If the capacitor tests borderline or the motor was struggling, the tech clamps an ammeter around the motor leads to confirm the motor itself is not drawing excessive current. A motor pulling above its rated full-load amps is a sign of internal wear.
IMPORTANT: Capacitors store a dangerous electrical charge even after the unit is powered off. A trained technician discharges the capacitor with a resistor before touching any terminals. Never probe a capacitor with bare hands or an uninsulated tool.
The tools involved, a multimeter, capacitance meter, and clamp ammeter, are standard HVAC diagnostic equipment. The skill is in interpreting the readings in context, not just reading the numbers.
Should you replace an AC capacitor yourself?
The short answer: probably not, and here is why that matters beyond just the obvious safety concern.
A capacitor holds a charge of several hundred volts even when the disconnect is pulled. That charge does not disappear on its own quickly. Touching the terminals without properly discharging the component first can cause a severe shock. That alone puts this job in a different category from changing an air filter or cleaning a condenser coil.
If you are still considering it, here is what the job actually requires:
- Shut off power at the outdoor disconnect AND the breaker panel. Pulling only the disconnect is not enough.
- Wait at least 30 minutes, or discharge the capacitor with a properly rated resistor. Do not skip this.
- Photograph all wiring before disconnecting anything. Capacitors have multiple terminals (HERM, FAN, C), and a wrong connection will damage the motor.
- Match µF and voltage exactly. The replacement capacitor must match the nameplate rating on the old unit. Going higher on µF damages motors; going lower causes hard starts.
- Use insulated tools rated for the voltage involved.
The tools you need include a multimeter, insulated screwdrivers, and a discharge resistor. The typical time a professional spends on a straightforward swap is 30–60 minutes, including diagnosis.
When to call a licensed HVAC technician instead:
- You are not comfortable working with high-voltage electrical components.
- The unit is under a manufacturer or extended warranty (DIY work can void it).
- The capacitor is on a rooftop unit or in a hard-to-access location.
- The system has multiple failing components, not just the capacitor.
- You cannot identify which capacitor type your unit uses.
Pro Tip: Even if you are handy, consider this: a $175 professional repair comes with a warranty on parts and labor. A DIY repair that damages the compressor motor can turn a $50 part into a $1,500–$3,000 problem.
What happens during a professional capacitor replacement?
Here is the sequence a technician follows on a standard residential call, and which invoice line items correspond to each step.
- Arrival and safety check (covered by the service call fee). The tech confirms the system symptoms, checks the outdoor disconnect, and reviews the unit’s data plate for voltage and model information.
- Diagnosis (part of the service call or a separate diagnostic fee). Visual inspection and capacitance measurement confirm the capacitor is the problem, not a failed motor or contactor.
- Power disconnect (included in labor). The tech pulls the outdoor disconnect and verifies zero voltage at the capacitor terminals with a multimeter.
- Discharge and swap (labor). The capacitor is safely discharged, the terminals are photographed, the old unit is removed, and the new capacitor is wired to match. This step takes 15–30 minutes on a straightforward job.
- System restart and re-test (labor). The tech restores power, starts the system, and verifies correct operation: fan speed, compressor amp draw, and supply/return temperature differential.
- Cleanup and invoice (included in the service call). The tech replaces the panel cover, removes the old capacitor, and provides a written invoice showing the part number, µF/voltage rating, and all labor charges.
A typical on-site time for a straightforward residential capacitor swap is 45–90 minutes, including diagnosis and re-test. Jobs that require additional diagnostic steps, such as checking motor amp draw or testing the contactor, will run longer.
How long do AC capacitors last, and how can you extend their life?
Most residential capacitors last roughly a decade or two under normal conditions, though units in hotter climates or areas with poor airflow often fail sooner, sometimes within 5 to 10 years. Heat is the primary enemy: every 10°C rise in operating temperature roughly halves the expected service life of the dielectric material inside.
Lifespan snapshot: A capacitor in a well-maintained unit with good airflow and surge protection can reach 15–20 years. The same capacitor in a unit buried behind overgrown shrubs in a St. Louis summer may fail in 7–8 years.
Steps that genuinely extend capacitor life:
- Keep the condenser coil clean. A dirty coil traps heat inside the cabinet, raising the temperature around the capacitor. An annual coil cleaning is one of the highest-return maintenance tasks you can do.
- Maintain at least 18–24 inches of clearance around the outdoor unit. Shrubs, fencing, and debris restrict airflow and raise cabinet temperatures.
- Install a whole-home surge protector. Voltage spikes from storms or grid switching are a leading cause of premature capacitor failure. A surge protector at the main panel costs $150–$300 installed and protects every component in the system.
- Have electrical connections checked during annual tune-ups. Loose terminals create resistance, which generates heat and stresses the capacitor.
- Ask about a hard-start kit if your compressor struggles. A hard-start kit reduces the electrical load on the capacitor at startup, which is especially useful for older compressors.
Real-world 2026 cost examples: low, typical, and high
Three scenarios show how the same basic repair can land at very different price points.
| Scenario | What Happened | Approximate Total |
|---|---|---|
| Low-cost single-run swap | Weekday appointment, single-run run capacitor, easy access, part in stock | $90–$150 |
| Typical dual-run swap | Weekday appointment, dual-run 45/5 µF capacitor, standard outdoor unit | $150–$250 |
| Higher-cost specialty job | Weekend emergency call, dual-run plus contactor replacement, rooftop unit | $90–$480 |
Regional pricing in the St. Louis metro area generally tracks the national average, though peak-summer demand (June through August) pushes labor rates and service call fees toward the higher end of their ranges. A technician who is booked solid in mid-July has less incentive to discount.
Common legitimate add-ons that raise the final bill:
- Contactor replacement: $75–$200 installed. The contactor is the electrical switch that sends power to the compressor and fan. It often wears alongside the capacitor and is worth replacing at the same visit if it shows pitting or burn marks.
- Hard-start kit: $75–$175 installed. Reduces startup stress on the compressor and the capacitor.
- Refrigerant top-off: If the tech finds low refrigerant during the diagnostic, that is a separate charge, typically $100–$300 depending on the amount needed and refrigerant type.
Catching a weak capacitor early avoids compressor damage, a common and expensive downstream failure. A $175 capacitor repair can prevent a $1,500–$3,000 compressor replacement if the motor is protected before it overheats from the strain of repeated hard starts.
Why hiring a licensed HVAC technician is worth it
The capacitor part costs $8–$60. The value a licensed technician brings is everything else.
- Correct part selection. A technician verifies the µF and voltage rating against the unit’s nameplate, not just the old capacitor’s label (which may already have been replaced with a wrong part).
- Safe handling of stored charge. Professionals discharge capacitors before touching terminals. This is not optional; it is the difference between a routine repair and an emergency room visit.
- Warranty on parts and labor. Most licensed HVAC companies offer a 30-day to 1-year warranty on the replacement part and the labor. DIY work carries no warranty.
- Correct diagnosis. A capacitor that tests weak is sometimes a symptom of a failing motor, not just an aging part. A technician who checks motor amp draw catches that before you pay for a capacitor and still have a broken system.
- Avoiding compressor damage. A mismatched or improperly installed capacitor can cause the compressor to run hot and fail prematurely. Compressor replacement costs $1,500–$3,000 or more.
When hiring, ask for the technician’s state HVAC license number, confirm the company carries liability insurance, and request a written warranty on both the part and the labor before work begins. Carrier’s guidance reinforces that professional installation is the right approach for correct rating verification and safe capacitor handling.
An honest perspective on capacitor diagnostics
There is a version of this repair that homeowners dread: the technician arrives, spends ten minutes in the backyard, and hands you a $400 invoice for a $15 part. That experience is real, and it is why so many people search “is this a rip-off?” before approving the work.
Here is what I have seen after years of HVAC work in St. Louis and Jefferson County: the frustration is understandable, but the math is usually defensible. The capacitor part is cheap. What you are paying for is a trained technician who can tell the difference between a failed capacitor and a failing compressor, who discharges the component safely before touching it, and who warranties the work. A flat-rate invoice that bundles diagnostic, part, and labor into one number can look like a markup, but it often reflects the true cost of a skilled trade call.
What is not defensible is a technician who replaces the capacitor without measuring it first, or who recommends a compressor replacement without checking whether the capacitor was the actual problem. Ask to see the capacitance reading before and after. Ask for the part number on the invoice. Those two questions separate a thorough technician from one who is guessing.
[Insert Alan’s professional HVAC credentials or background]
[Insert case studies or testimonials authored by Alan]
At Ricottaheatingandair, the commitment is straightforward: diagnose honestly, recommend only what the system actually needs, and explain the invoice line by line. No pressure, no upsell.
Ricottaheatingandair is ready to help with your capacitor repair
When your AC stops cooling on a hot St. Louis afternoon, you need a technician who shows up promptly, diagnoses the problem correctly the first time, and gives you a clear invoice without surprises. That is exactly what Ricottaheatingandair delivers to homeowners across St. Louis and Jefferson County, backed by 150+ five-star Google reviews and 50 years of local HVAC experience.

Ricottaheatingandair handles capacitor diagnostics, same-part replacements, and full system tune-ups for all major brands, including Carrier, Trane, Lennox, and Rheem. The service call fee is applied toward the repair when you approve the work, so you are not paying twice. A maintenance plan keeps your system inspected annually, catching weak capacitors before they fail on the hottest day of the year. Homeowners in Cedar Hill, Mehlville, Manchester, and surrounding communities can book a diagnostic visit online or by phone today.
Sources
The cost figures and diagnostic guidance in this article draw from the following sources. Each is worth bookmarking if you want to verify ranges or read deeper on a specific topic.
- AC Capacitor Replacement Cost: How Much to Replace | SmartService blog
- AC Capacitor Replacement Cost: What’s Fair, What’s a Rip-Off (2026) - Thermostat & HVAC Helpers
- HVAC Capacitor Replacement Cost 2026 | Run vs Start vs Dual-Run
- What is an AC Capacitor? | Cost, Signs of Failure & Replacement - Carrier
- AC Run Capacitor Replacement Cost Guide for Homeowners 2026 – Current Cost