
Frozen AC Coils: What Homeowners Should Do Right Now
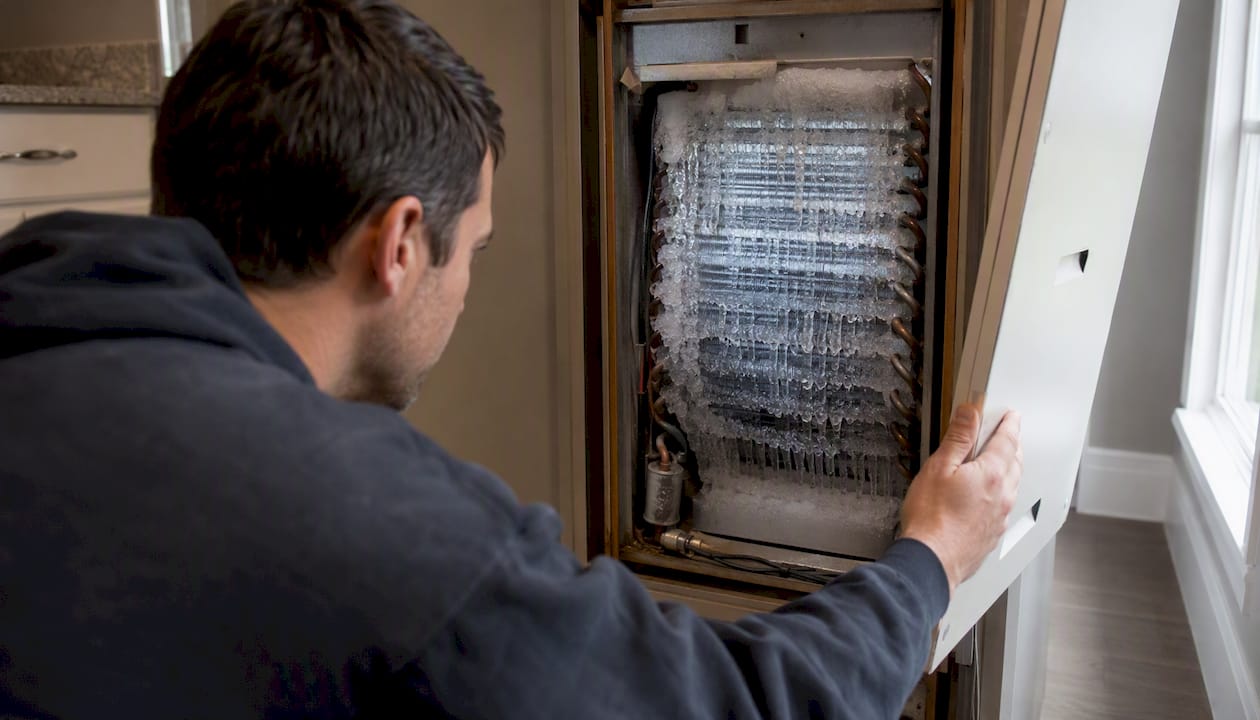
If your AC is blowing warm air or you can see ice on the refrigerant lines, turn your thermostat from Cool to Off right now, then set the fan to On. That single move stops compressor damage and starts the thaw. Running the compressor while the evaporator coil is frozen can push liquid refrigerant back into the compressor, which is one of the most expensive failures in an HVAC system.
Here is what to do in the next five minutes:
- Turn the thermostat to Off (not just a higher temperature — fully off cooling mode).
- Set the fan to On so room-temperature air circulates across the coil and speeds the thaw.
- Do not restart cooling until the coil is completely thawed and dry, typically a few hours.
- Check your air filter right now. If it looks gray and clogged, replace it before you restart.
- Walk through your home and make sure every supply and return vent is open and unobstructed.
Safety first: Never run your AC compressor with frozen coils. The repair bill for a failed compressor can easily reach four figures. A few hours of patience now protects the most expensive component in your system.
Key Takeaways
Frozen AC coils almost always trace back to restricted airflow or low refrigerant, and the safest immediate action is to turn cooling off, run the fan to thaw the coil, and replace the filter before restarting.
| Point | Details |
|---|---|
| Immediate action | Turn thermostat to Off and set fan to On; never run the compressor with frozen coils. |
| Top causes | Dirty filter, blocked vents, dirty coil, weak blower, or low refrigerant from a leak. |
| Thaw timeline | Fan-only thaw typically takes 1–4 hours; do not restart cooling until the coil is fully clear. |
| Call a pro when | Coils re-freeze after a proper thaw, or you suspect a refrigerant leak or blower failure. |
| Ricottaheatingandair | Offers same-day frozen-coil diagnostics in St. Louis and Jefferson County with no-pressure repair recommendations. |
Table of Contents
- What are the signs that your AC coils are frozen?
- What causes frozen AC coils in the first place?
- How to safely defrost your AC coils right now
- Safe DIY checks you can do after the coil thaws
- When should you stop DIYing and call a licensed technician?
- How long does thawing take, and what do repairs typically cost?
- A short maintenance checklist to prevent frozen coils from coming back
- Common myths and safety warnings about frozen coils
- What to expect when Ricottaheatingandair diagnoses frozen coils
- An honest take on frozen coils and what homeowners get wrong
- Ricottaheatingandair can diagnose and fix frozen coils the same day
- Sources
What are the signs that your AC coils are frozen?
Before you can fix the problem, you need to confirm that frozen evaporator coils are actually what you are dealing with, not a refrigerant issue alone or a failing capacitor.
Obvious signs:
- Visible ice on the refrigerant lines running from the indoor air handler, or frost on the outdoor unit’s copper lines
- Weak or warm airflow from supply vents even though the system is running
- Water pooling or dripping around the base of the indoor air handler after the system has been running a while
- Ice visible through the air-handler access panel on the coil itself
Less obvious indicators:
- Your home runs several degrees warmer than the thermostat setting, but the system never shuts off
- The system seems to cool better in the morning than in the afternoon or evening
- You hear a faint hissing sound near the indoor unit
- The outdoor unit’s refrigerant lines feel unusually cold or show frost
How to verify:
Open the air-handler access panel carefully if you feel comfortable doing so. Look for frost or ice on the coil fins. Check the return-air register in a central hallway: hold your hand near it and feel whether suction is noticeably weak. If your AC freezes up at night but seems fine during the day, that is a classic sign of a marginal airflow or refrigerant issue that becomes more apparent during cooler overnight temperatures and longer run cycles.
What causes frozen AC coils in the first place?
Understanding the root cause tells you whether a filter swap will solve this or whether you need a technician on-site. The two most common culprits are restricted airflow and low refrigerant, and they produce freezing through different mechanisms.
-
Dirty or clogged air filter. A heavily loaded filter is like trying to breathe through a pillow. The coil cannot absorb enough heat from the air passing over it, so its surface temperature drops below 32°F and ice forms. This is the most common cause and the easiest fix.
-
Blocked or closed supply and return vents. Closing vents in unused rooms feels like it should save energy, but it actually starves the system of airflow and creates the same freezing effect as a dirty filter.
-
Dirty evaporator coil. Even with a clean filter, dust and debris accumulate on coil fins over time. A dirty evaporator coil reduces heat transfer and can cause icing just as a clogged filter does.
-
Weak or failed blower motor. If the blower is not moving enough air across the coil, the coil gets too cold regardless of how clean the filter is. A failing capacitor on the blower motor is a common culprit.
-
Low refrigerant from a leak. When refrigerant charge drops, pressure inside the coil falls, and the coil temperature drops below freezing. This is a mechanical problem that requires a licensed technician to find the leak, repair it, and recharge the system.
-
Thermostat or control issues. A thermostat that keeps the system running far longer than needed, or one set to a temperature lower than the outdoor dew point allows, can contribute to icing, especially overnight.
Pro Tip: If a proper thaw and a fresh filter fix the problem once but the coils freeze again within a day or two, that pattern points strongly to a refrigerant leak or a failing blower, not a simple airflow blockage. Do not keep repeating the thaw cycle without getting a technician to check the refrigerant charge.
How to safely defrost your AC coils right now
Follow these steps in order. Skipping ahead or rushing the process can cause water damage or compressor failure.
- Switch the thermostat from Cool to Off. Do not just raise the set point — fully disable cooling mode.
- Set the fan to On (not Auto). This keeps the blower running and circulates warm room air across the frozen coil to speed thawing.
- Replace a visibly dirty filter now. Pull the filter out and hold it up to light. If you cannot see light through it, swap it for a fresh one before you restart the system.
- Place towels around the base of the air handler. As the ice melts, water will drain through the condensate line. If that line is partially clogged, water can overflow the drain pan.
- Wait 1–4 hours. Lighter icing thaws in about an hour with the fan running. Heavy ice accumulation can take longer. Do not rush this.
- Inspect the coil before restarting. Once you believe the coil is clear, look through the access panel. No visible frost or ice means you can switch back to Cool mode.
- Monitor the first 30 minutes after restart. If the system cools normally and no ice returns, you are likely dealing with an airflow issue you have already corrected. If ice starts forming again, shut it down and call a technician.
Do not do any of these: Do not chip ice off the coil with a screwdriver or any tool — you can puncture a refrigerant line. Do not aim a hair dryer or heat gun at the fins. Do not pour hot water over the coil. Rapid temperature changes can crack fins, damage tubing, and cause refrigerant leaks that turn a simple fix into a costly repair.
Safe DIY checks you can do after the coil thaws
Once the coil is fully thawed and dry, these are the homeowner checks worth doing before you call anyone. Most require nothing more than a flashlight and a replacement filter.
- Change the air filter. Use the size printed on the side of the existing filter. A MERV 8–11 rating balances filtration and airflow well for most residential systems. Avoid very high-MERV filters (13+) unless your system is specifically rated for them, as they can restrict airflow enough to cause freezing on their own.
- Open every supply and return vent in the house. Walk room by room. Furniture pushed against a return grille is a surprisingly common cause of restricted airflow.
- Check the condensate drain line. The drain line runs from the air handler to a floor drain or outside. If it is clogged with algae or debris, the drain pan overflows. You can often clear a minor clog by pouring a cup of distilled white vinegar into the access port near the air handler.
- Confirm thermostat settings. Make sure the fan is set to Auto (not On) for normal operation after thawing, and that the set temperature is not unrealistically low for your outdoor conditions.
- Look at the coil fins through the access panel. If they appear heavily coated with gray or brown debris, the coil needs professional cleaning, not just a filter change.
Pro Tip: If you are not comfortable opening the air-handler access panel or working near the electrical disconnect, stop here. The checks above are safe for most homeowners, but anything involving the coil directly, the refrigerant lines, or the electrical components belongs with a licensed technician.
For a more detailed step-by-step troubleshooting walkthrough, the AC running but not cooling guide covers overlapping scenarios that homeowners in the St. Louis area run into regularly.
When should you stop DIYing and call a licensed technician?
Some frozen-coil situations are genuinely beyond what a homeowner should attempt. Here is when to pick up the phone.
Call a technician if you notice any of these:
- The coils freeze again within 24–48 hours of a proper thaw and filter change. Re-freezing after a correct thaw is a reliable signal of a refrigerant leak or mechanical failure.
- You hear a hissing or bubbling sound near the indoor unit or refrigerant lines, or you see an oily residue on the lines. Both suggest a refrigerant leak.
- Airflow from the vents is weak even with a clean filter and all vents open, which points to a blower motor or capacitor problem.
- You smell something burning near the air handler, or a breaker trips when the system starts.
- Water is overflowing the drain pan and you cannot clear the condensate line yourself.
What a technician will check on the visit:
- Refrigerant pressure and temperature readings to confirm charge and detect leaks
- Blower motor amperage draw and capacitor health
- Evaporator coil condition and professional coil cleaning if needed
- Condensate drain line clearing
- Thermostat calibration and control board function
Questions worth asking during the service visit:
- What exactly caused the freezing, and was a refrigerant leak confirmed?
- Is repair the right call, or is the system old enough that replacement makes more financial sense?
- What are the repair costs, and does the work carry a warranty?
- Would a maintenance plan prevent this from recurring?
For homeowners in the Crystal City or Arnold areas, the Crystal City HVAC service page and Arnold HVAC page outline what a diagnostic visit covers and how to schedule one.
How long does thawing take, and what do repairs typically cost?
Thaw timelines:
- Light icing with the fan running typically thaws within an hour or so, moderate to heavy ice accumulation can take several hours, and severe icing may take longer; do not rush it.
Repair timelines:
- Filter replacement and vent clearing: same-day, often under 30 minutes
- Professional coil cleaning: typically completed during a single service visit
- Refrigerant leak diagnosis and recharge: usually same-day or next-day depending on leak complexity
- Blower motor or capacitor replacement: often same-day if the part is in stock
Ballpark repair cost ranges (these vary by region, system age, and brand):
| Repair Type | Typical Cost Range | Notes |
|---|---|---|
| Filter replacement (DIY) | low homeowner cost | Homeowner cost only |
| Professional coil cleaning | moderate cost, varies by coil access and condition | Varies by coil access and condition |
| Capacitor replacement | $150–$300 | Common blower fix, often same-day |
| Blower motor replacement | higher cost, varies by motor type | Parts and labor; varies by motor type |
| Refrigerant recharge (no leak) | variable cost depending on refrigerant and service fee | Per pound of refrigerant plus service fee |
| Refrigerant leak repair + recharge | can be expensive depending on leak location and severity | Depends on leak location and severity |
Cost figures are general estimates based on local service experience and vary by market, system brand, and labor rates. Always get a written estimate before authorizing repair work.
A short maintenance checklist to prevent frozen coils from coming back
Frozen evaporator coils are almost always preventable. The habits below take very little time and protect a system that costs thousands of dollars to replace.
Monthly or as-needed:
- Check the air filter and replace it when it looks gray or loaded. Most homes need a new filter every 1–3 months depending on pets, dust, and system runtime.
- Walk through the house and confirm all supply and return vents are open and unobstructed.
Each cooling season:
- Schedule a spring tune-up before the heat arrives. A professional tune-up includes coil cleaning, refrigerant pressure check, blower inspection, and condensate drain clearing.
- Verify thermostat programming so the system is not running at an unrealistically low set point overnight.
- Check the condensate drain line for algae buildup and flush it with vinegar if needed.
Annually:
- Have a technician inspect the evaporator coil and blower motor. Catching a weak blower or a slow refrigerant leak early costs far less than a compressor replacement later.
- Consider a maintenance agreement that covers these checks automatically. Most plans include priority scheduling during peak summer demand, which matters when your AC goes down in a St. Louis heat wave.
Common myths and safety warnings about frozen coils
A few widely repeated ideas about frozen coils are not just wrong — they can make the situation worse.
Myth: “Turning the temperature down colder will push through the ice.” Lowering the set point keeps the compressor running against a frozen coil, which risks compressor damage and does nothing to thaw the ice. The opposite is true: cooling must stop for the coil to thaw.
Myth: “I can chip the ice off and restart right away.” Chipping ice off the coil with any tool risks puncturing the refrigerant tubing or bending the aluminum fins. Either outcome turns a simple freeze-up into a refrigerant leak repair.
Myth: “A heat gun or hair dryer speeds up the thaw safely.” Applying direct heat to the coil causes rapid thermal expansion that can crack fins and damage tubing. Manufacturer guidance from both Trane and Carrier is consistent. Room-temperature air from the fan is the only safe thawing method.
Heat pump owners — important distinction:
Do not confuse your heat pump’s outdoor defrost mode with a solution for a frozen indoor evaporator coil. The outdoor defrost cycle clears ice from the outdoor unit’s coil during heating season. It does nothing to thaw an iced indoor evaporator coil during cooling season and should not be used as a workaround.
Safety behaviors to avoid:
- Pouring hot water over the indoor coil or drain pan
- Restarting the compressor before the coil is fully thawed and dry
- Ignoring a re-freeze after a proper thaw (it will not resolve on its own)
- Leaving a clogged condensate drain unaddressed while the system runs
What to expect when Ricottaheatingandair diagnoses frozen coils
Knowing what a professional visit actually looks like helps you prepare and ask the right questions. Here is how the team at Ricottaheatingandair approaches a frozen-coil call.
Step 1: Intake questions. The technician asks how long the problem has been happening, whether the system re-froze after a thaw, and whether you noticed any unusual sounds or smells. These answers narrow the likely cause before the panel is even opened.
Step 2: Safety check. The technician confirms the system is off and the coil is thawed before opening the air handler. Working on a frozen coil is unsafe and produces inaccurate readings.
Step 3: Airflow measurements. Static pressure and airflow are checked at the return and supply registers. A reading outside the normal range points immediately to a filter, vent, or blower issue.
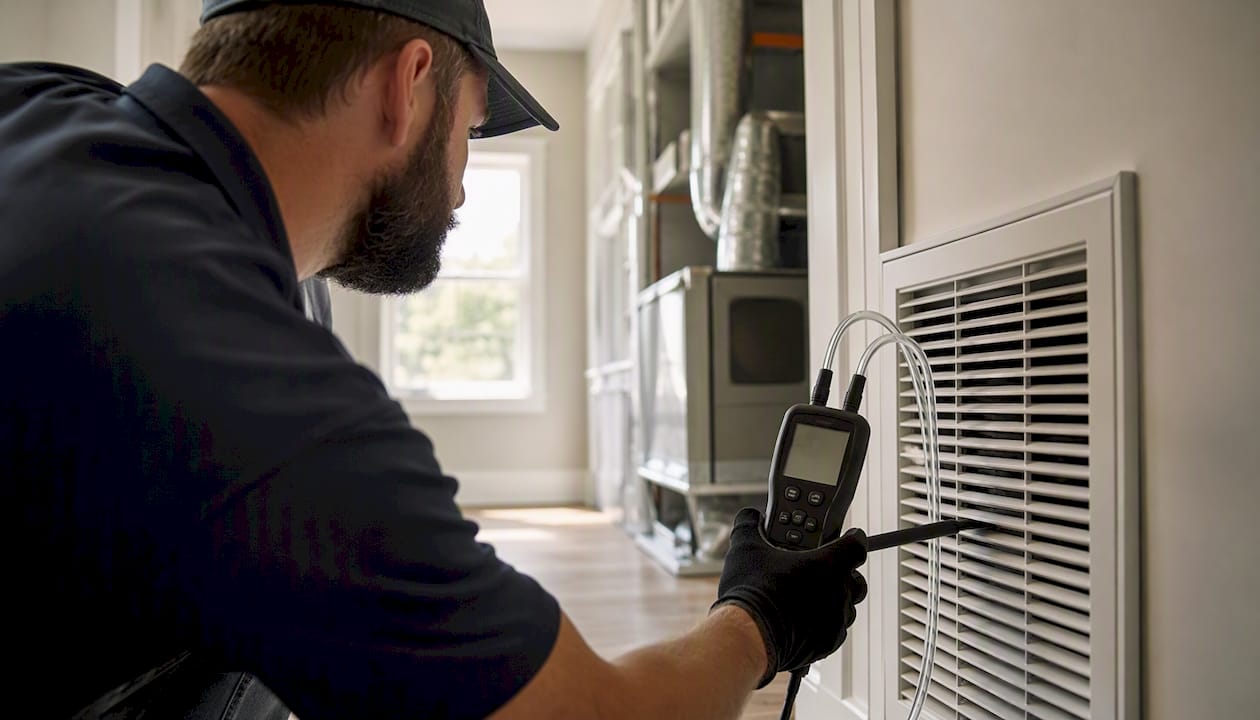
Step 4: Refrigerant pressure and temperature diagnostics. Gauges are connected to the service ports to check system pressure against the manufacturer’s specifications. Low pressure is a strong indicator of a refrigerant leak.
Step 5: Coil inspection and cleaning. The technician inspects the coil fins for debris, damage, and signs of icing patterns that reveal the freeze location. If the coil is dirty, professional cleaning is performed on-site.
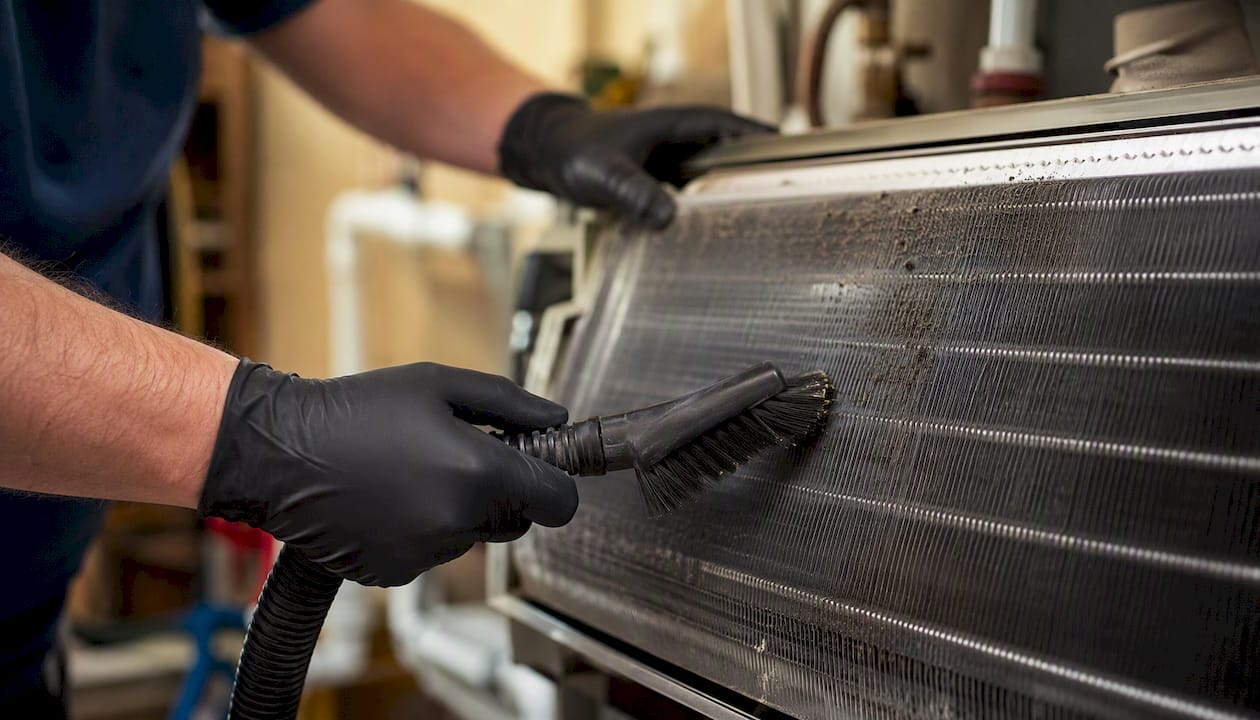
Step 6: Leak detection. If refrigerant pressure is low, an electronic leak detector or UV dye is used to locate the leak. The technician shows you the evidence and explains the repair options.
Step 7: Quote and repair conversation. You receive a clear explanation of what was found, what repair is recommended, what it costs, and whether the system’s age makes replacement worth considering. No pressure, no upselling.
What homeowners tell us: The most common surprise on a frozen-coil visit is finding out the blower capacitor has been weak for months. It is a $150–$300 fix that, left alone, leads to a full blower motor failure and a much larger bill.
Ricottaheatingandair brings 50 years of local expertise and 150+ five-star Google reviews to every service call in St. Louis and Jefferson County. The team services all major brands, including Trane, Carrier, Lennox, and Rheem, so whatever system you have, the diagnostic process is the same.
For homeowners in the Oakville area, there is also a local-specific guide to why AC systems freeze up in that part of St. Louis County.
An honest take on frozen coils and what homeowners get wrong
The most common mistake homeowners make with a frozen AC is treating it as a one-time inconvenience rather than a diagnostic signal. A coil freezes for a reason. Thawing it and restarting without finding that reason is the HVAC equivalent of clearing a check-engine light by pulling the fuse.
What frustrates me most is the advice to “just replace the filter and see if it comes back.” That is good advice as far as it goes, but it stops short of the real question: why was the filter so dirty in the first place, and how long has the system been struggling? A system that freezes up has often been running inefficiently for weeks before the ice becomes visible. The homeowner’s energy bill has been climbing, the compressor has been working harder than it should, and the coil may already have accumulated enough debris to need professional cleaning regardless of how clean the new filter is.
The other thing worth saying plainly: refrigerant does not just disappear. If a technician tells you the system is “a little low” and recharges it without finding and fixing the leak, you will be back in the same situation within a season or two. A proper repair addresses the leak, not just the symptom.
The good news is that most frozen-coil situations are genuinely fixable, often on the same day, when the root cause is correctly identified. The homeowner checks in this guide are worth doing. But if the coil re-freezes after you have done them, that is the system telling you it needs a professional, not another thaw cycle.
Ricottaheatingandair can diagnose and fix frozen coils the same day
When a filter swap and vent check do not solve the problem, or when you suspect a refrigerant leak, Ricottaheatingandair offers same-day diagnostic visits across St. Louis and Jefferson County. As a family-owned team with 50 years of local experience, the approach is straightforward: find the actual cause, explain it clearly, and give you a repair option with no pressure to spend more than the situation requires.

A diagnostic visit covers airflow testing, refrigerant pressure checks, coil inspection, and condensate drain evaluation. If the fix is a capacitor swap or a coil cleaning, it is often completed the same visit. If a refrigerant leak requires more involved repair, you get a clear written estimate before any work begins.
To prevent future freeze-ups, ask about Ricottaheatingandair’s HVAC maintenance plans, which include annual coil cleaning, refrigerant checks, and priority scheduling during peak summer demand. For homeowners ready to book a diagnostic visit now, the Mehlville service page is a good starting point, or call the team directly to schedule.
Sources
The following sources were used to compile this guide. Each represents manufacturer guidance or documented local service experience on frozen evaporator coils.
- Top 5 Causes of Frozen AC Coils and How to Fix Them - Trane®
- Will Frozen AC Fix Itself? | Guide to Frozen AC Coils - Carrier
- AC Frozen Up? Why Your Las Vegas AC Ices Over and How to Fix It – ACE – Air Conditioning Experts Las Vegas
- Why Does My AC Freeze Up at Night? | Beacon Services & Appliance
These sources were selected because they represent either the original equipment manufacturers’ own guidance or documented field experience from licensed HVAC service providers, giving homeowners the most reliable starting point for understanding and addressing frozen coil problems.