
AC Leaking Water: Quick Fixes and When to Call a Pro

An AC leaking water almost always means the condensate drainage system is disrupted. Turn the unit off at the thermostat right now, before anything else.
Once the system is off, take these immediate steps:
- Cut power completely. Switch off the thermostat, then flip the breaker for the air handler. Water and electricity near the same cabinet is a real hazard.
- Protect your flooring. Lay down towels or a shallow pan under the air handler or furnace to catch any standing water.
- Find the drain pan. Look beneath the indoor unit for a white or gray plastic tray. If it’s full, that’s your first confirmation.
- Glance at the air filter. A filter so clogged it looks gray or brown is often the root cause. You can pull it out and check in 30 seconds.
- Take photos. Snap pictures of the pan, the drain outlet, and any water stains before you touch anything. A technician will thank you for it.
Most AC leaks are urgent maintenance, not emergencies. The exception: if water is actively soaking into a ceiling, wall, or touching any electrical components, treat it as an emergency and call a pro immediately.
Table of Contents
- Why is your AC leaking water?
- How to find where the water is coming from
- Safe DIY fixes you can try right now
- When should you call a professional?
- How to prevent AC leaks before they start
- What a trusted local technician will check on your system
- Key Takeaways
- The mistake that costs homeowners the most
- Ricottaheatingandair can fix your AC leak today
- Useful sources and further reading
Why is your AC leaking water?
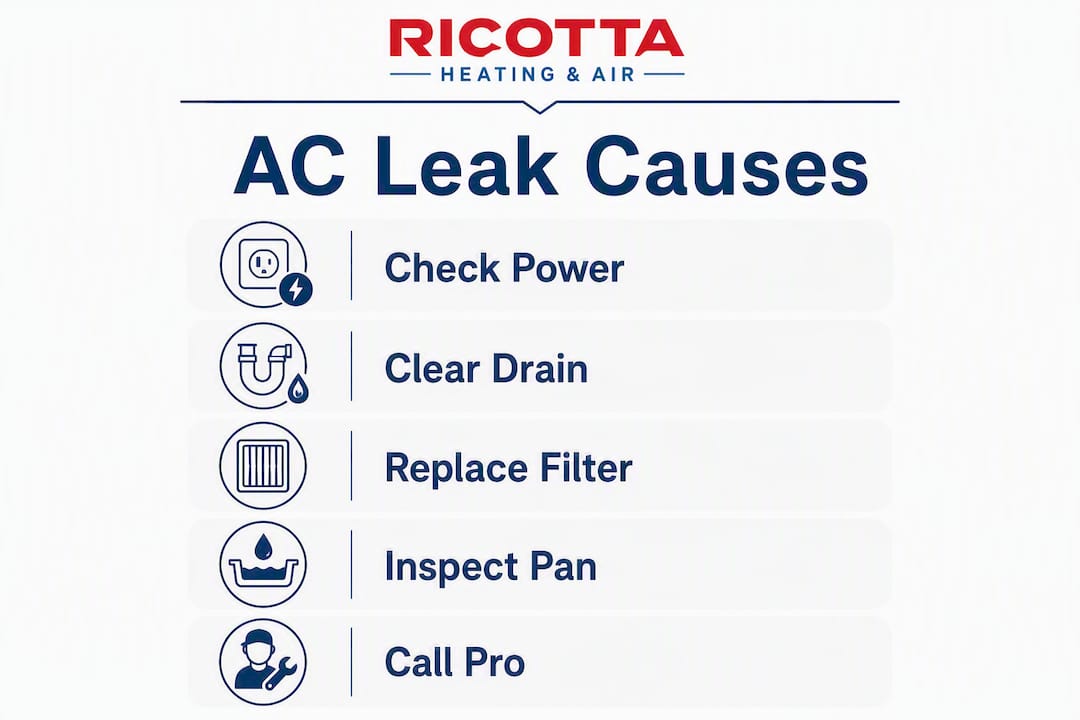
Clogged condensate drain lines, frozen evaporator coils, and damaged drain pans are the three most common culprits behind a leaking AC. Here’s how each one shows up and what to look for.
| Cause | What you’ll see | Quick check |
|---|---|---|
| Clogged condensate drain line | Water pooling in or overflowing the drain pan | No drip from the outdoor drain stub during operation |
| Frozen evaporator coil | Ice on refrigerant lines or the coil; water after thaw | Feel the large copper line near the air handler for frost |
| Damaged or rusted drain pan | Visible cracks, rust stains, or water on the floor | Shine a flashlight under the unit and inspect pan edges |
| Disconnected or improperly pitched drain line | Water dripping from unexpected spots near the air handler | Trace the PVC drain line from the unit to the wall |
| Failed condensate pump | Water backing up when the drain exits through a wall or ceiling | Listen for the pump; no hum during operation is a red flag |
| Extreme humidity or improper installation | Excessive condensation on ductwork or the cabinet | Check if the problem worsens on the most humid days |
The clogged condensate drain is by far the most frequent cause. During a humid St. Louis summer, algae and biofilm grow inside the 3/4-inch PVC drain line fast enough to block it within a single cooling season. A frozen evaporator coil is the second most common issue, and it almost always traces back to either a dirty air filter restricting airflow or low refrigerant. Think of a clogged filter like trying to breathe through a wet pillow: the coil can’t get enough warm air across it, temperatures drop below freezing, and ice forms. When the system cycles off, that ice melts straight into the drain pan.
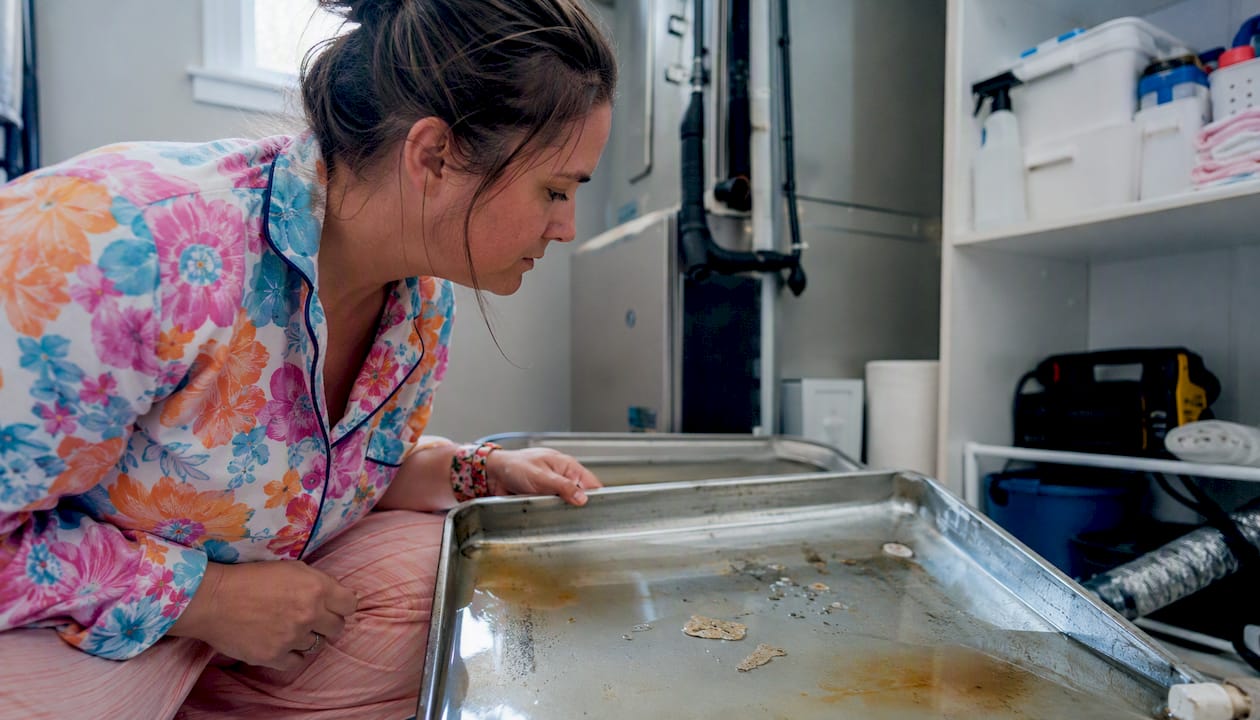
A damaged drain pan is sneakier. Plastic pans crack over time; metal pans rust. The pan can hold water for weeks before a hairline crack finally lets it seep onto your floor or ceiling below.
How to find where the water is coming from
IMPORTANT: Power off the air handler at the breaker before opening any access panels.
- Check the primary drain pan. Pull the access panel on your air handler and look directly beneath the evaporator coil. A pan with standing water confirms drainage is blocked somewhere downstream.
- Inspect the indoor T-fitting (cleanout). Most systems have a white PVC T-fitting near the air handler with a removable cap. Pull the cap and look for standing water or slime buildup inside.
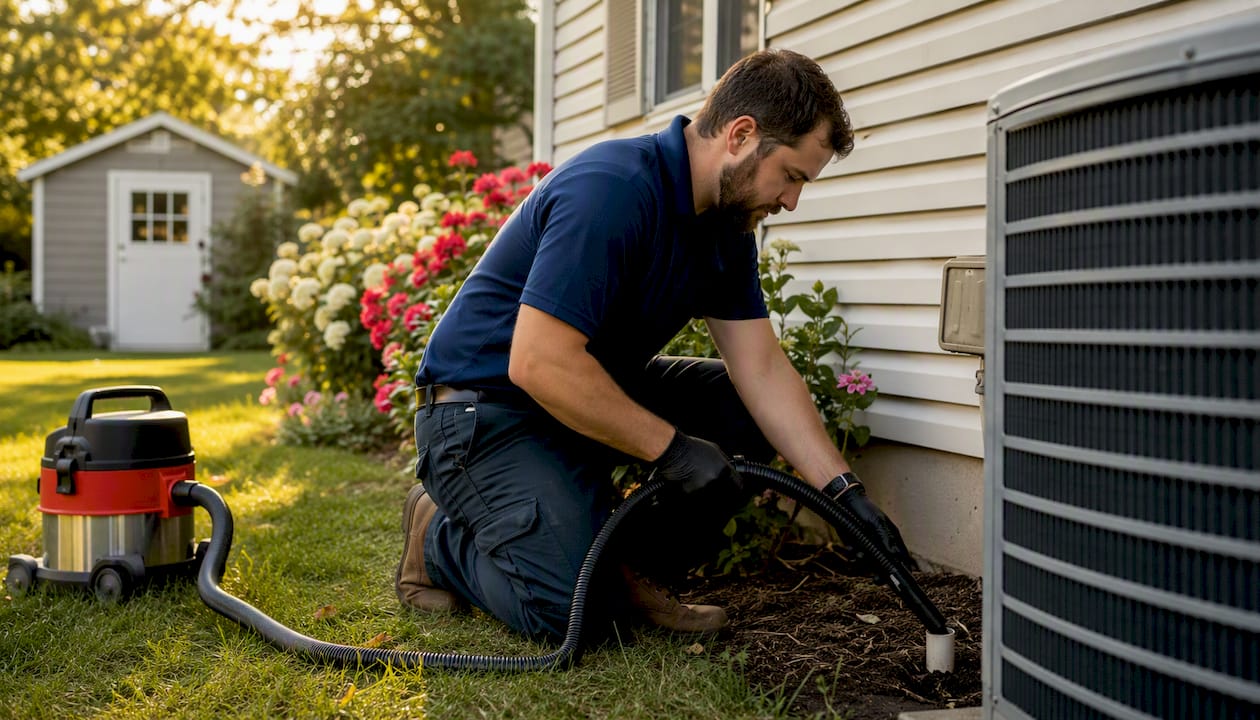
- Go outside and find the drain stub. This is a short PVC pipe exiting the house near the foundation or through the wall. During normal operation, you should see a slow, steady drip. No drip at all means the line is blocked.
- Pull the air filter. A filter that’s gray, matted, or visibly clogged is restricting airflow enough to freeze the coil. Replace it before doing anything else.
- Look for ice on the evaporator coil. With the access panel open, check the coil and the large copper refrigerant line for frost or ice. Ice means the coil froze and is now thawing into the pan.
- Locate the condensate pump (if your system has one). In basements or interior closets where the drain can’t flow by gravity, a small pump moves water out. Check for standing water around it or a red indicator light.
- Test the float switch. Modern systems include a float switch in the drain pan that shuts the system off when water rises too high. If your AC suddenly stopped working on a hot day, a tripped float switch is often why. Gently lift the float with your finger; if the system tries to start, the float was triggered by a full pan.
- Check ceilings and walls near the air handler. Yellow or brown water stains above a first-floor ceiling or on a closet wall point to a leak that’s been happening longer than you realized.
Photos to take for your technician: the drain pan (showing water level), the outdoor drain stub (showing whether it’s dripping), any ice on the coil or lines, and your thermostat display showing the current mode and temperature. Each one helps a tech diagnose faster and quote more accurately.
Pro Tip: If your AC is in the attic, be especially careful accessing it. Attic units that overflow can cause significant ceiling damage quickly. Keep a secondary pan under attic units and check it every cooling season.
Safe DIY fixes you can try right now
IMPORTANT: Shut off power at both the thermostat and the breaker before opening the air handler access panel.
What you’ll need: a wet/dry shop vacuum (Shop-Vac works well), a flexible bottle brush, distilled white vinegar, a replacement air filter that matches your current size, a flashlight, and your phone for photos.
Clearing a clogged condensate drain
Turn off power, locate the outdoor drain stub, press the vacuum hose firmly against it to create a seal, and run the vacuum for 60 seconds. The suction pulls algae and slime out in one shot. Follow that with a vinegar flush: go back inside, remove the cap from the T-fitting near the air handler, and slowly pour one cup of distilled white vinegar into the opening. Let it sit for 30 minutes, then flush with water. This two-step method resolves most condensate drain clogs without any special tools or chemicals.
Replacing a dirty air filter
Pull the old filter out, note the size printed on the frame, and install a new one with the airflow arrow pointing toward the air handler. A fresh filter immediately restores airflow across the evaporator coil, which is often all it takes to prevent the coil from refreezing.
Thawing a frozen evaporator coil
Switch the thermostat to fan-only mode (not cooling). Run the fan for 2–4 hours to melt the ice. Do not run the compressor while the coil is frozen. Running it risks compressor damage, which is a far more expensive repair than a clogged drain. Once the ice is gone and the pan has drained, replace the filter and restart cooling. If the coil freezes again within a day or two, low refrigerant is the likely cause and you’ll need a technician.
Avoid corrosive drain cleaners like Drano in your condensate line. They can damage PVC fittings, rubber seals, and the coating on your drain pan. Distilled white vinegar is safer for every component in the system and still kills the biofilm causing the clog. Stick with vinegar.
What NOT to do:
- Don’t poke or brush the evaporator coil fins. They bend easily and restrict airflow permanently.
- Don’t run the system with a frozen coil.
- Don’t attempt refrigerant work yourself. Handling refrigerant without EPA 608 certification is illegal and dangerous.
- Don’t ignore a tripped float switch. It’s protecting your home; find the cause before resetting it.
Pro Tip: Pour one cup of distilled white vinegar into the T-fitting cleanout once a month from May through September. It takes two minutes and prevents the biofilm buildup that causes most summer drain clogs.
When should you call a professional?
Some situations are beyond what a homeowner should attempt. Call a pro when:
- The drain line is still blocked after a vacuum and vinegar flush
- Ice returns on the coil within 24 hours of thawing (low refrigerant is likely)
- The drain pan is cracked, rusted through, or visibly damaged
- The condensate pump runs but water isn’t moving, or the pump doesn’t run at all
- You smell something electrical or notice a tripped breaker near the air handler
- Water stains have appeared on ceilings or walls (structural damage may already be underway)
- The float switch keeps tripping within hours of being reset
A persistent leak after a DIY clear usually points to pan damage, a collapsed pipe, or coil-rooted biofilm that a vacuum can’t reach. These need professional tools and diagnosis.
What a technician will inspect: drain line and trap condition, drain pan integrity, condensate pump operation, evaporator coil cleanliness and condition, refrigerant level, float switch function, system airflow, and whether the drain line has the correct slope and diameter.
Rough cost expectations (St. Louis area rates vary by company and season):
- Drain line cleaning and flush: typically $75–$200
- Condensate pump replacement: typically $150–$350 including parts
- Drain pan replacement: typically $200–$600 depending on accessibility
- Refrigerant diagnosis and recharge: typically $200–$600 or more depending on the refrigerant type and leak location
- Emergency/after-hours service call: add $50–$150 to standard rates
Most drain-clearing visits are completed in under an hour. Refrigerant work or pan replacement may require a return visit for parts. While you wait for a technician, keep the system off, contain standing water with towels, and run a fan or dehumidifier to dry the area and reduce mold risk.
How to prevent AC leaks before they start
A little routine maintenance goes a long way, especially during Jefferson County’s humid summers. Here’s a calendar-friendly schedule:
| Task | Frequency | Why it matters |
|---|---|---|
| Replace air filter | Every 1–3 months | Prevents frozen coils and downstream drain clogs |
| Vinegar flush through T-fitting | Monthly, May–September | Kills biofilm before it blocks the drain line |
| Inspect outdoor drain stub | Monthly during cooling season | Confirms drainage is flowing; catches early clogs |
| Test float switch | Once per year (spring startup) | Verifies the safety shutoff works before you need it |
| Professional tune-up | Once per year | Catches refrigerant issues, coil buildup, and pan wear early |
| Check secondary/overflow pan (attic units) | Every cooling season | Prevents ceiling damage from slow leaks |
A few upgrades worth considering:
- Install a T-access cleanout if your system doesn’t have one. It makes the annual vinegar flush a 2-minute job instead of a 20-minute one.
- Add a drain pan alarm for attic-mounted units. These inexpensive sensors alert you before water overflows.
- Consider a whole-home dehumidifier. In St. Louis, summer humidity regularly pushes past 70%. A dehumidifier reduces the moisture load on your AC, which means less condensate, less strain on the drain line, and a longer-lived system overall.
Pro Tip: Set a phone reminder for the first of every month from May through September: “Pour vinegar in AC drain.” That two-minute habit prevents most summer service calls.
What a trusted local technician will check on your system
When Ricottaheatingandair sends a technician to your home, here’s what a thorough service call looks like from start to finish.
On arrival: the tech confirms power is off, checks for any active water flow, and assesses whether there’s visible structural damage that needs to be documented before work begins.
Systematic inspection:
- Drain line suction test and visual inspection of the trap and slope
- Drain pan check for cracks, rust, and proper seating
- Float switch operation test (lift and confirm system response)
- Evaporator coil inspection for ice, biofilm, and fin damage
- Condensate pump test (if present): run cycle, check discharge line
- Refrigerant pressure check to rule out low charge as the cause of coil freezing
- Airflow measurement and filter condition review
- Drain line slope and diameter verification (a line pitched incorrectly will clog repeatedly)
Questions worth asking your technician:
- What caused this specific leak, and is it likely to recur?
- Is the drain pan in good enough condition to last another season?
- Does my system have a T-access cleanout, and if not, can you install one today?
- What’s the expected service life of the condensate pump?
- Do you offer a written estimate before starting any repair?
Ricottaheatingandair has served St. Louis and Jefferson County homeowners for 50 years, with 150+ five-star Google reviews built on transparent diagnostics and honest recommendations. Whether you’re in Mehlville, Arnold, or anywhere across the service area, the approach is the same: tell you exactly what’s wrong, show you the evidence, and give you options without pressure.
Always ask for a written estimate and photos of any damage or completed repair. A reputable tech will provide both without hesitation.
Key Takeaways
A clogged condensate drain line is the most common reason an AC leaks water, and a wet/dry vacuum plus a vinegar flush resolves most cases before a technician is needed.
| Point | Details |
|---|---|
| Turn off power first | Shut off the thermostat and breaker immediately to prevent water damage and electrical hazards. |
| Most common cause | A clogged condensate drain line, often cleared with a wet/dry vacuum at the outdoor stub and a vinegar flush. |
| Frozen coil protocol | Switch to fan-only for 2–4 hours to thaw; replace the filter before restarting cooling. |
| Call a pro when | Ice returns within 24 hours, the drain pan is damaged, or leaks persist after DIY attempts. |
| Ricottaheatingandair | Serves St. Louis and Jefferson County with transparent diagnostics, drain-line cleaning, pan repair, and annual maintenance plans. |
The mistake that costs homeowners the most
Most AC water leaks I see could have been caught weeks earlier. The homeowner noticed a faint musty smell or a small damp spot, assumed it would clear up, and kept running the system. By the time they called, the drain pan had been overflowing intermittently for a month, and the drywall below the air handler needed replacing.
The conventional wisdom is to “check your filter every month.” That’s correct, but it misses the bigger point: the filter is your early-warning system for the entire condensate drainage chain. A dirty filter leads to a frozen coil, which leads to a flooded pan, which leads to a tripped float switch, which leads to a “broken AC” call on the hottest day of July. Every step in that chain is preventable with a $10 filter and five minutes of attention.
The other mistake I see regularly is homeowners reaching for Drano or a similar drain cleaner when the vinegar flush doesn’t work on the first try. Corrosive cleaners damage the PVC fittings and the pan coating, turning a $150 drain-cleaning visit into a $400 pan replacement. Vinegar is slower, but it won’t cost you a drain pan.
If you’ve done the vacuum, done the vinegar flush, replaced the filter, and the system is still leaking or the coil is still freezing, stop. That’s the line between DIY and professional territory. Refrigerant work, pan replacement, and deep coil cleaning require tools and training that protect both you and the system. Document what you found, take photos, and call a tech who will give you a straight answer.
Ricottaheatingandair can fix your AC leak today
When the vinegar flush and filter swap don’t solve it, or you’d rather have a professional handle it from the start, Ricottaheatingandair is ready to help. With 50 years of experience serving St. Louis and Jefferson County, the team handles every AC leak scenario: drain-line cleaning and cleanout installation, condensate pan repair and replacement, condensate pump service, refrigerant diagnosis and repair, and annual maintenance plans that keep the system running clean all season.

No upselling, no pressure. You get an honest diagnosis, a written estimate, and a clear explanation of your options before any work begins. Ricottaheatingandair services homeowners across the St. Louis metro and Jefferson County, including Manchester and the surrounding communities. Call or book online to schedule a diagnostic visit, and get your AC running right before the next heat wave hits.
Useful sources and further reading
The sources below were used to verify causes, DIY methods, and safety recommendations throughout this guide.
| Source | What it covers |
|---|---|
| Why Is My AC Leaking Water? — Carrier | Primary causes of AC water leaks and manufacturer prevention steps |
| How to Clean an AC Drain Line — Carrier | Step-by-step drain cleaning method and when to call a professional |
| AC Leaking Water — Trane | Frozen coil diagnosis, symptoms, and safe thawing procedure |
| How to Stop an AC Water Leak — Direct Energy | DIY steps and recommendation for adding a T-access cleanout |
| AC Drain Line Clogged — Venta HVAC | Float switch behavior, vacuum workflow, and when persistent clogs need a pro |
| Why Is My AC Leaking Water? — Bryant | Manufacturer overview of causes, immediate steps, and repair guidance |