
3–5 Bulb Swaps in 5 Years: UV for HVAC in St. Louis
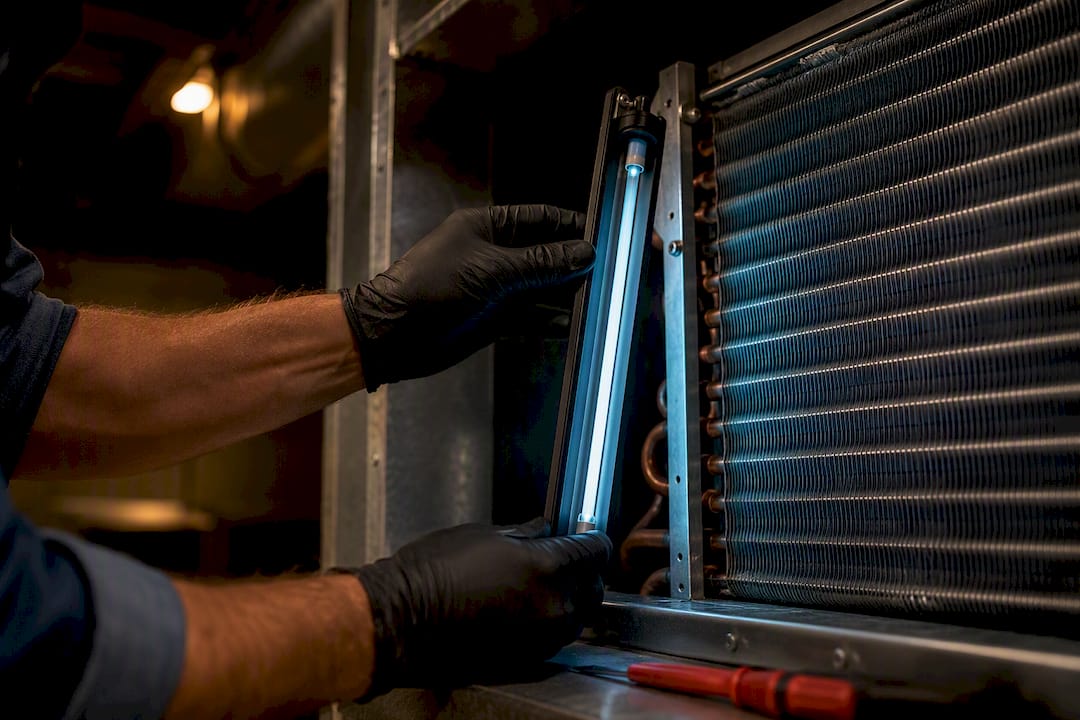
UVC light reliably controls mold and biofilm buildup on your air conditioner’s evaporator coil when it’s installed correctly, and it can cut down on musty odors and coil cleanings. What it can’t promise is whole-house air sterilization. That depends on lamp intensity, dosage, and duct airflow, which is why ASHRAE and AHRInet both stress professional sizing. Get a qualified technician to check your humidity levels and coil condition before you buy anything.
TL;DR:
- In-duct UV systems struggle to reliably kill microbes passing at high speeds without proper sizing and increased intensity.
- UV effectiveness depends heavily on precise placement, appropriate dosage, and matching the system to your specific airflow and coil geometry.
- Coil-mounted UV lights are more reliable for mold control because they have longer exposure time on stationary surfaces.
- Maintenance includes annual lamp replacement, regular cleaning, and inspection to ensure the system’s ongoing performance.
- UV installation is safest and most effective when performed by qualified technicians, with attention to shielding and adherence to safety guidelines.
Table of Contents
- How UV Light for HVAC Systems Actually Works
- Does UV Light Really Kill Mold and Germs in Ducts?
- Where Should a UV Light Be Installed in an HVAC System?
- What Does a UV Light for HVAC Cost to Install and Maintain?
- Should You Install a UV Light Yourself or Hire a Pro?
- How Do You Maintain a UV Light and Know It’s Working?
- Is a UV Light Worth Installing in Your HVAC System?
- Ricotta Heating & Air: A Field Perspective on UV Installation
- How to Get a UV Light Installed the Right Way
- Where to Learn More About UV Light and HVAC Standards
- Sources
How UV Light for HVAC Systems Actually Works
Think of UVC light as a tiny demolition crew for cell walls. It’s a specific wavelength of ultraviolet radiation that scrambles the DNA and RNA inside bacteria, mold spores, and viruses, so they can’t reproduce. That’s the whole mechanism, and it’s why hospitals have used germicidal UV for decades in air handling systems.
In residential HVAC, you’ll run into two different setups, and they solve two different problems.
- Coil-mounted UV lights aim directly at the evaporator coil and drain pan, the dark, damp real estate inside your air handler where mold loves to set up shop.
- In-duct or air-sanitizing systems sit inside the ductwork itself, trying to zap airborne microbes as they pass by on their way to your living room.
The coil-mounted version has an easier job. It’s hitting a stationary target with plenty of dwell time. The in-duct version is trying to kill germs moving past at several feet per second, which is a much tougher ask (more on that in the next section).
You’ll also choose between two lamp technologies. Conventional mercury UVC bulbs are the traditional option, generally rated for 12 months of continuous use before their output drops off. LED UVC systems, like the Nu-Calgon Scorpion line, cost more upfront but run for tens of thousands of hours, which can stretch replacement intervals out for years instead of months. LEDs also skip the mercury disposal issue entirely, since there’s no mercury inside them. Run time matters here more than raw wattage: a lamp that’s always on delivers a steady, predictable dose, while one that cycles with your blower fan delivers less exposure per hour and takes longer to show results on a fouled coil.
Does UV Light Really Kill Mold and Germs in Ducts?
The honest answer is: it depends on where you put it and how it’s engineered. ASHRAE’s technical guidance is blunt about this. UV effectiveness isn’t just about slapping a bulb wattage on a spec sheet. It’s about delivered dose, measured in microjoules per square centimeter, matched to your specific airflow and coil geometry. Get that math wrong, and you’ve got an expensive nightlight.
The gap between lab results and your ductwork: Clinical and laboratory studies confirm UVC can inactivate bacteria and viruses under controlled exposure, but those tests typically hold the target in front of the light for a set, generous exposure time. NCBI research on UV disinfection notes that residential “fly-by” in-duct applications, where air rushes past a lamp for a fraction of a second, need considerably higher intensity to approach those same kill rates.
That’s the core tension in this whole product category. Coil-mounted lights work with physics on their side: the coil isn’t moving, and the lamp can bathe it in UV for hours on end. In-duct systems are fighting against airflow speed, and unless a licensed technician sizes the lamp and placement correctly, the “sanitized air” claim on the box may be more marketing than measurement.
One more limit worth knowing: UV light doesn’t remove particulates. It doesn’t do anything about dust, pet hair, or pollen sitting in your ductwork. It kills living organisms it directly irradiates; it doesn’t filter anything. That’s why UV works best paired with solid filtration and, just as important, humidity control, since damp air is what feeds mold growth on that coil in the first place.
Where Should a UV Light Be Installed in an HVAC System?
Placement decides whether your investment actually earns its keep. Here’s how a properly planned installation typically goes:
- Evaporator coil and drain pan first. This is the preferred, highest-value location because it’s the wettest, darkest surface in your whole system and the most common breeding ground for mold and biofilm. AHRInet’s installation guidance lists this as the standard recommended placement.
- Return duct as a secondary option. Some homeowners add a lamp in the return duct to catch airborne microbes before they reach the coil, but this location has real limits given the airflow-speed problem covered above. It supplements coil protection; it doesn’t replace it.
- Material shielding wherever the lamp sits. UV degrades certain plastics, rubber gaskets, and non-UV-rated filter media over time, and it can weaken wire insulation that isn’t rated for exposure. Installers commonly wrap vulnerable components in reflective aluminum tape, or simply relocate the lamp angle, so nothing nearby takes UV damage it wasn’t built to handle.
Mounting itself is usually straightforward for a technician: some units attach with magnets, others bolt onto a bracket screwed into the cabinet, and higher-output systems get hardwired into either 24VAC control circuits or, on larger commercial-style units, 110 to 277VAC power. The mounting method matters less than the shielding step. Skip that, and you may trade a mold problem for a cracked drain pan or a fried sensor wire a year down the road.
What Does a UV Light for HVAC Cost to Install and Maintain?
Budget is usually the first question, and the answer splits pretty cleanly along the coil-mounted versus in-duct line.
| Cost item | Coil-mounted UV | In-duct / air-sanitizing UV |
|---|---|---|
| Installed cost range | moderate cost range to install coil-mounted units | moderate to higher cost range to install in-duct systems |
| Main cost drivers | Access to air handler, wiring | Ductwork cutting, transformer, sizing |
| Conventional bulb life | typical lifespan ranges from several months to a couple of years depending on model and usage | 12 months |
| LED bulb life | Tens of thousands of hours | Tens of thousands of hours |
| Replacement lamp price | $30 to $120 | $30 to $120 |
Those installed cost ranges reflect what most contractors quote for parts and labor combined, and the spread mostly comes down to access. A coil sitting right behind an easy-to-remove panel costs less to service than one buried in a tight mechanical closet.
Over five years, a conventional mercury bulb system means three to five lamp swaps at $30 to $120 each, plus whatever service call fee your technician charges to do the swap. An LED system front-loads that cost into the purchase price but may not need a single lamp replacement in the same window. Either way, the real savings usually show up on the other side of the ledger: fewer coil cleanings, fewer drain pan clogs from algae buildup, and a system that isn’t fighting reduced airflow from a fouled coil. Pair a UV install with a regular maintenance plan and you’re less likely to get surprised by either cost.
Should You Install a UV Light Yourself or Hire a Pro?
Kits are sold for DIY installation, and for a simple coil-mounted magnet unit, a handy homeowner can technically manage it. But there are real reasons most people call a technician instead.
UVC exposure is genuinely dangerous to unprotected skin and eyes. The CDC’s guidance on UV radiation safety is clear that even brief direct exposure can cause burns comparable to sunburn, and eye exposure can cause painful, temporary vision problems. Add in the fact that a broken mercury bulb needs careful cleanup, not a shop vac and a shrug, and the “quick weekend project” starts looking riskier than it sounds.
- Never look directly at an activated UVC lamp, even briefly.
- Always power down the unit before opening the cabinet for any reason.
- If a mercury bulb breaks, ventilate the area and avoid vacuuming glass fragments, which can spread mercury vapor.
- Skip any product marketed as “ozone-generating,” since the EPA warns that ozone is a lung irritant, not an air purifier, despite how some vendors frame it.
There’s also a warranty angle homeowners often miss. Many equipment manufacturers specify approved UV placement and wattage limits, and installing an oversized or poorly placed in-duct system can void coverage on the coil or air handler itself, especially if UV-related heat or material degradation contributes to a later failure.
Pro Tip: Before hiring anyone, ask three direct questions: how will they calculate dosage for your specific duct size, what material shielding will they use near plastics or wiring, and do they include lamp replacement in a service plan or is that a separate call every time?
How Do You Maintain a UV Light and Know It’s Working?
Once it’s installed, the maintenance load is genuinely light, but skipping it defeats the purpose.
- Check the mount and warning label every few months during a filter change, confirming the bracket is secure and the safety label is still visible and legible.
- Replace the lamp annually if you’re running a conventional mercury bulb, even if it still glows. UV output degrades well before the light visibly dims, so a bulb that “looks fine” may already be doing half the job.
- Wipe the bulb surface and check seals once a year, since dust film on the glass blocks UV output just like a dirty windshield blocks headlights.
- Watch for performance signs: less musty smell coming from the vents, a visibly cleaner coil at your next tune-up, and fewer drain pan clogs from algae growth.
If odors persist, the coil still looks fouled at inspection, or the drain line keeps backing up despite an active lamp, that’s your signal to call for service rather than assume the unit is doing nothing. Sometimes it’s a burned-out bulb nobody noticed; sometimes it’s a placement issue from day one.
Is a UV Light Worth Installing in Your HVAC System?
The decision usually comes down to three factors: your home’s humidity, your coil’s history, and your budget.
UV tends to be a high priority if any of these sound familiar:
- Your indoor humidity regularly sits above 60%, creating ideal conditions for mold on the coil.
- You’ve had recurring coil fouling or musty odors that keep coming back even after professional cleaning.
- Someone in the home has asthma, allergies, or another condition made worse by mold exposure.
It’s a lower priority if your humidity is well controlled, your coil was just professionally cleaned and inspected, or your budget is better spent on a more immediate repair.
A sensible path forward looks like this: measure your indoor humidity first, inspect the coil (or ask your technician to, at your next tune-up) for existing buildup or odor, then consult a professional for proper sizing before choosing between a coil-mounted or in-duct system. If humidity control itself is the bigger issue, a whole-home indoor air quality upgrade may deliver more comfort than UV alone, with UV working as the complement rather than the whole solution.
Ricotta Heating & Air: A Field Perspective on UV Installation
Most UV conversations online skip the boring part: the coil inspection that should happen before anyone talks about lamps or LEDs. We check indoor humidity, look for existing biofilm or discoloration on the coil, and ask about odor complaints before recommending anything, because a $900 in-duct system solves nothing if the real issue is a humidity setting three degrees too high.
We install both coil-mounted and LED systems depending on what the house actually needs, and we handle the wiring and shielding work that keeps warranties intact. Lamp replacement gets folded into our service agreements, so it’s not a separate scramble every year. Fifty years in St. Louis and Jefferson County homes means we’ve seen which UV installs actually earn their keep, and which ones were sold as a fix for a humidity problem UV was never going to solve.
— Alan
How to Get a UV Light Installed the Right Way
If you’ve read this far, you already know the honest version: UV works best on the evaporator coil, works better with correct sizing, and works best of all alongside good humidity control and filtration. That’s exactly the evaluation Ricottaheatingandair runs on every indoor air quality visit across St. Louis and Jefferson County, no upsell pressure, no guessing at lamp wattage.

A typical visit starts with a coil inspection and a humidity check, moves into a straightforward conversation about whether coil-mounted or in-duct makes sense for your system, and ends with a written recommendation, not a hard pitch. If UV isn’t the right fix for what’s actually going on in your ductwork, we’ll tell you that too. For homes that need ongoing lamp swaps and coil checks handled automatically, our HVAC maintenance plans fold that into your regular tune-up visit so you’re never guessing when the bulb needs replacing. Reach out to schedule an indoor air quality evaluation and find out what your coil and your humidity levels are actually telling you.
Where to Learn More About UV Light and HVAC Standards
- ASHRAE’s technical standards cover the engineering principles behind dosage and airflow matching.
- Trane’s UV light explainer breaks down coil versus in-duct system basics.
- AHRInet’s installation notes detail placement, material risks, and replacement schedules.
- Nu-Calgon’s Scorpion UVC-LED spec page shows a real-world LED system’s mounting and wiring options.
- A partner resource on HVAC service intervals offers useful context for scheduling lamp checks alongside routine maintenance.
Sources
- What Is UV Light in HVAC? - Trane®
- Air filtration and ultraviolet light treatment - AHRInet
- ASHRAE standards and guidance
- NCBI paper on UV disinfection